Registro e Inicio de Sesion
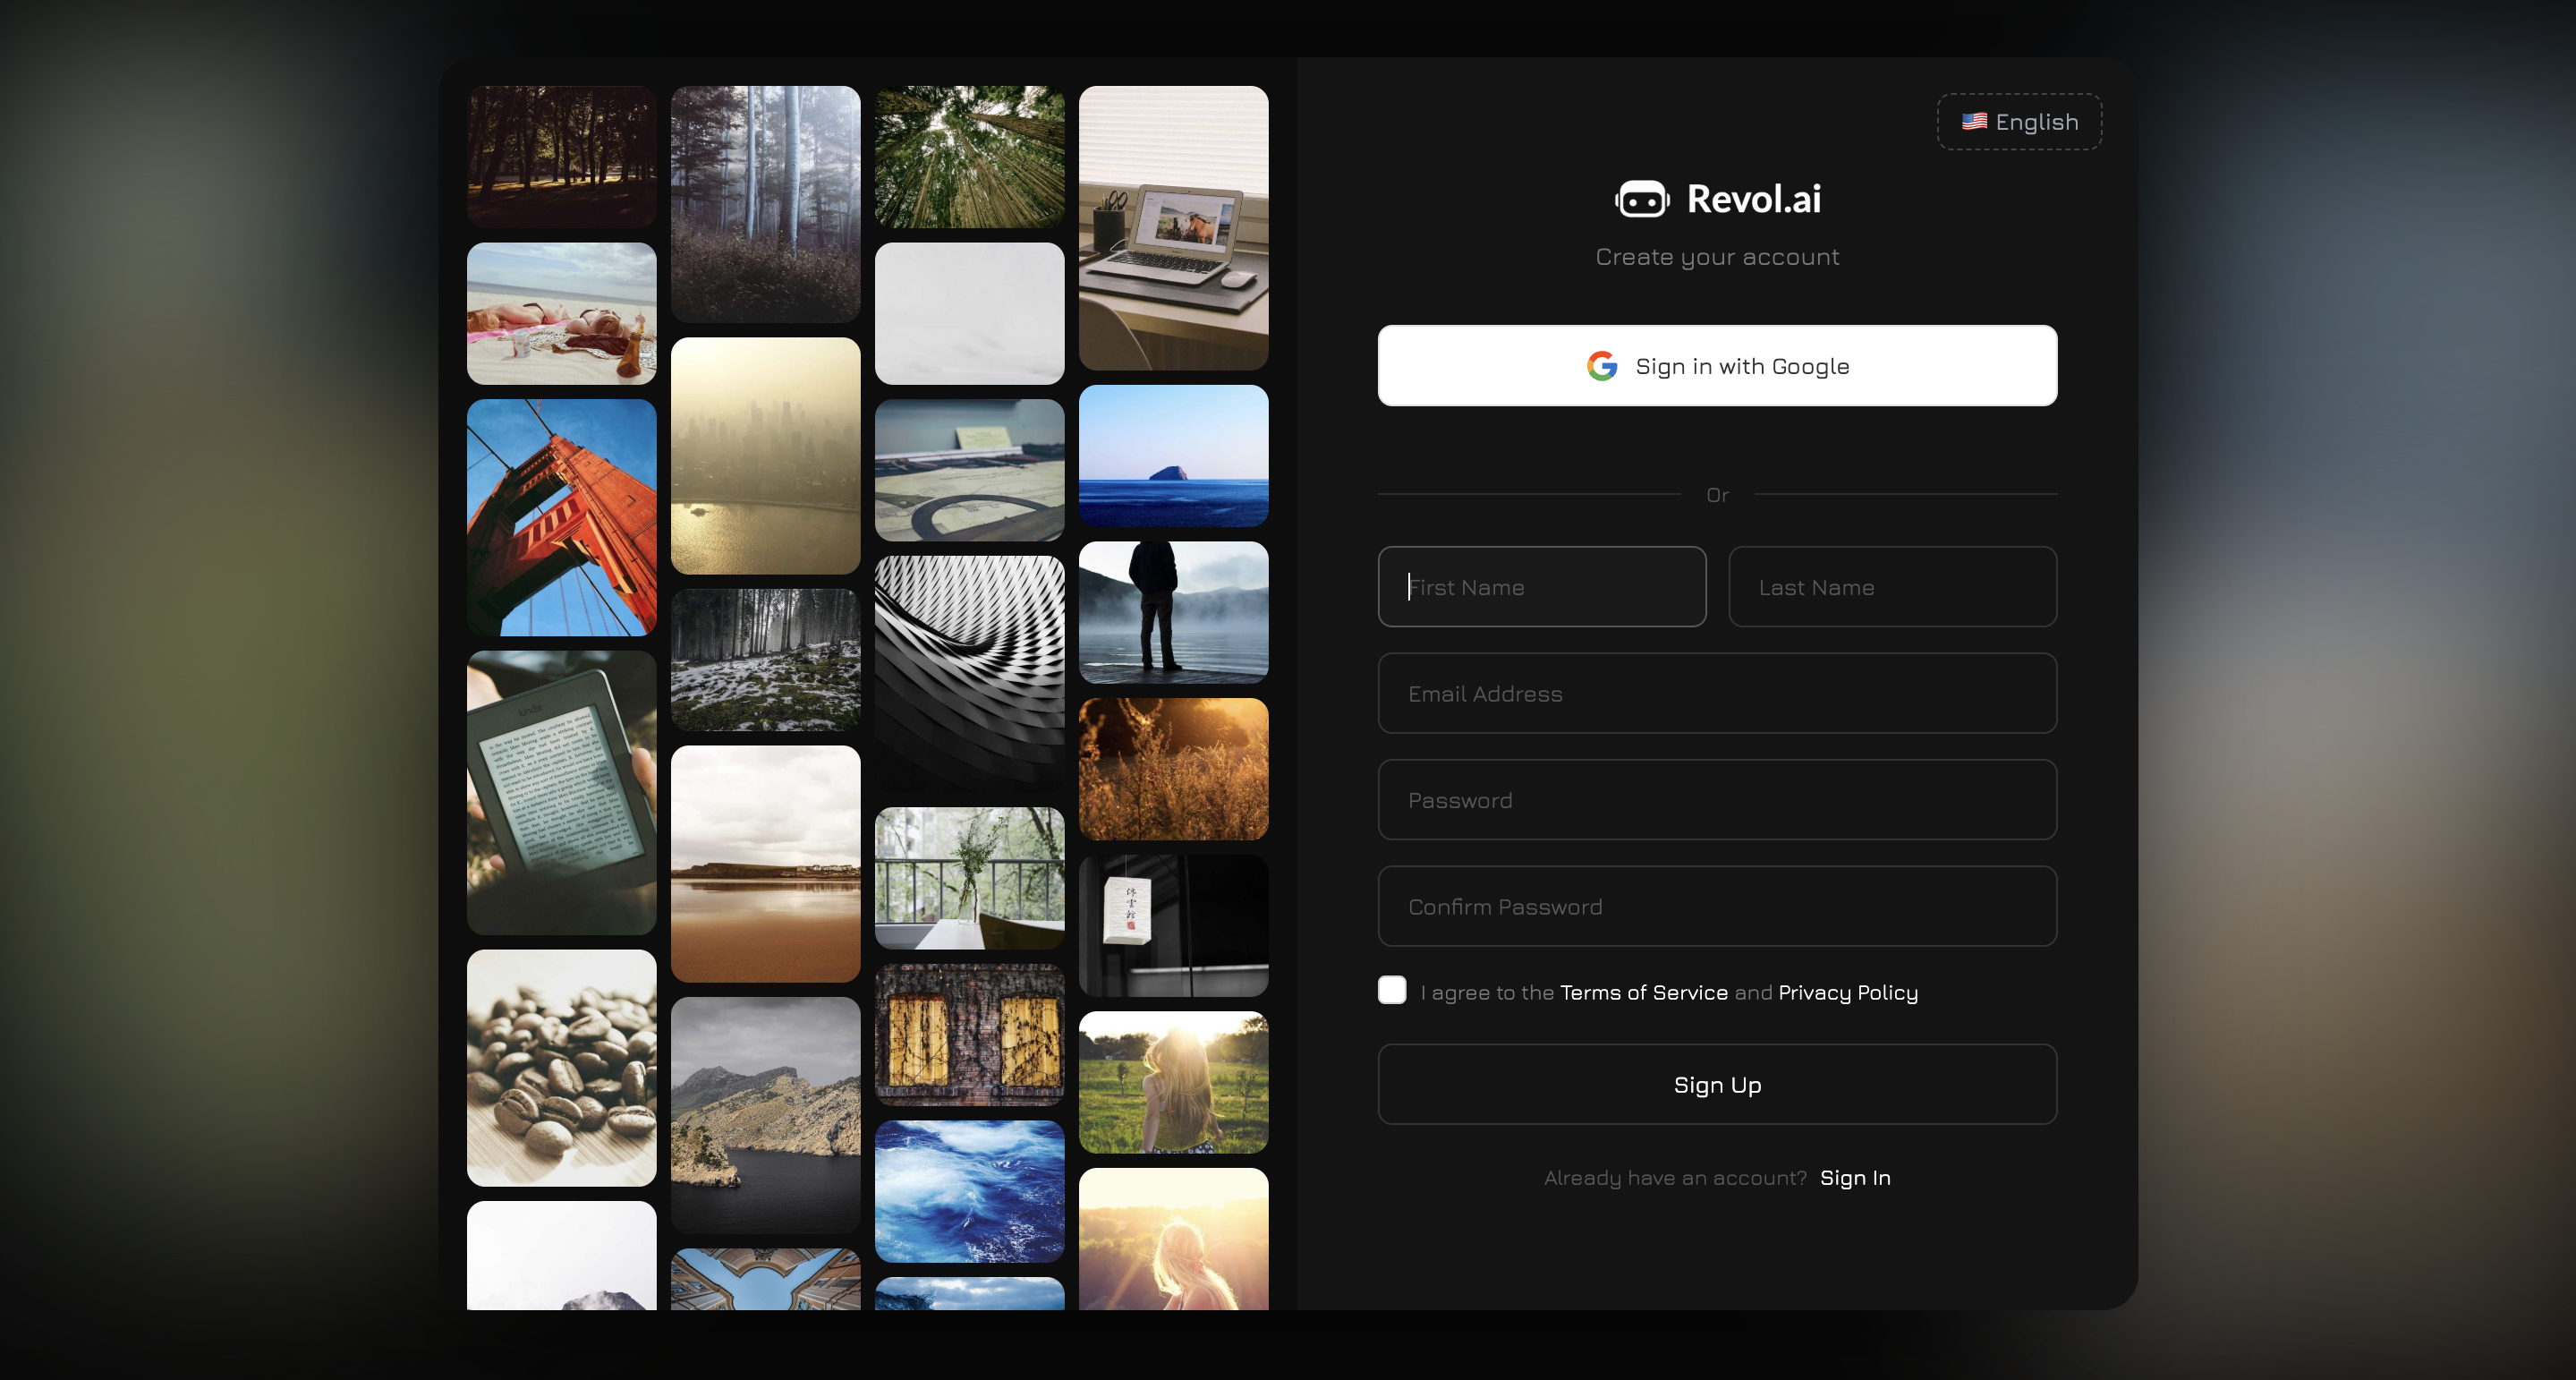
Revol ofrece dos formas de crear una cuenta:- Google OAuth — haga clic en “Continuar con Google” y autorice con su cuenta de Google. La forma mas rapida.
- Correo electronico + contrasena — complete el formulario: nombre, apellido, correo electronico, contrasena y confirmacion de contrasena. Debe aceptar los Terminos de Servicio y la Politica de Privacidad.
Si ya tiene una cuenta, utilice la pagina de inicio de sesion — las mismas opciones de Google OAuth o correo electronico/contrasena. Hay una funcion de “Recordarme” y recuperacion de contrasena por correo electronico.

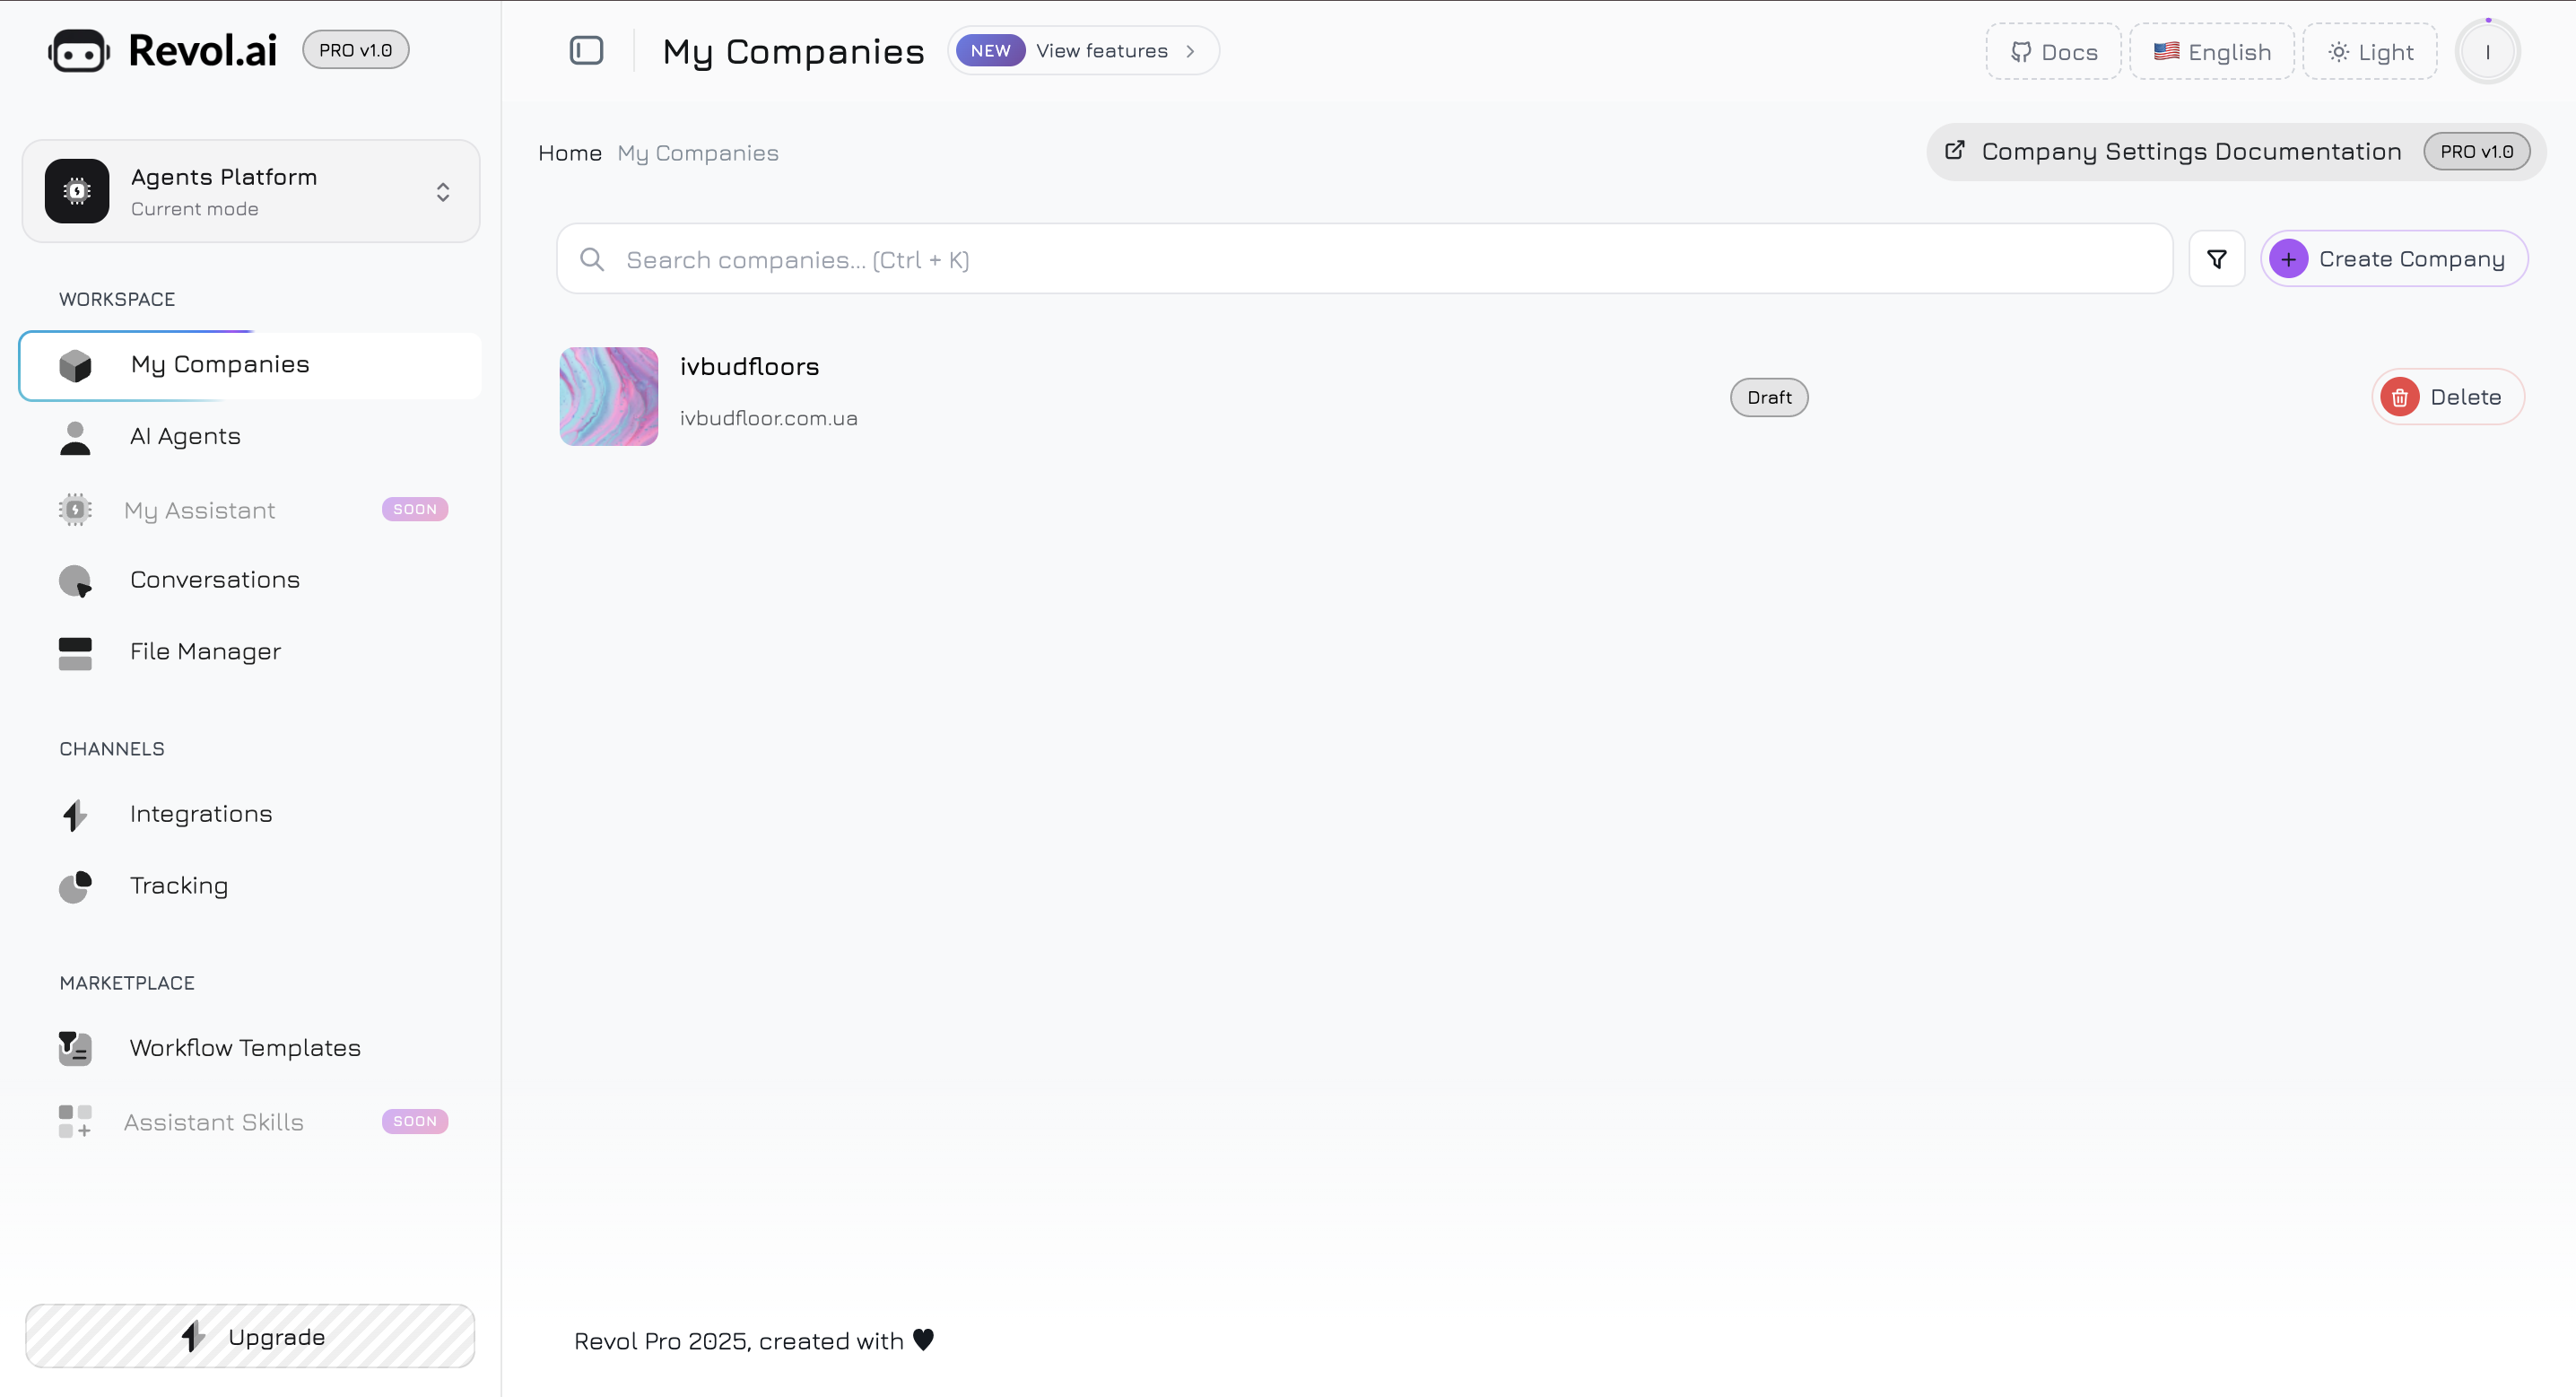
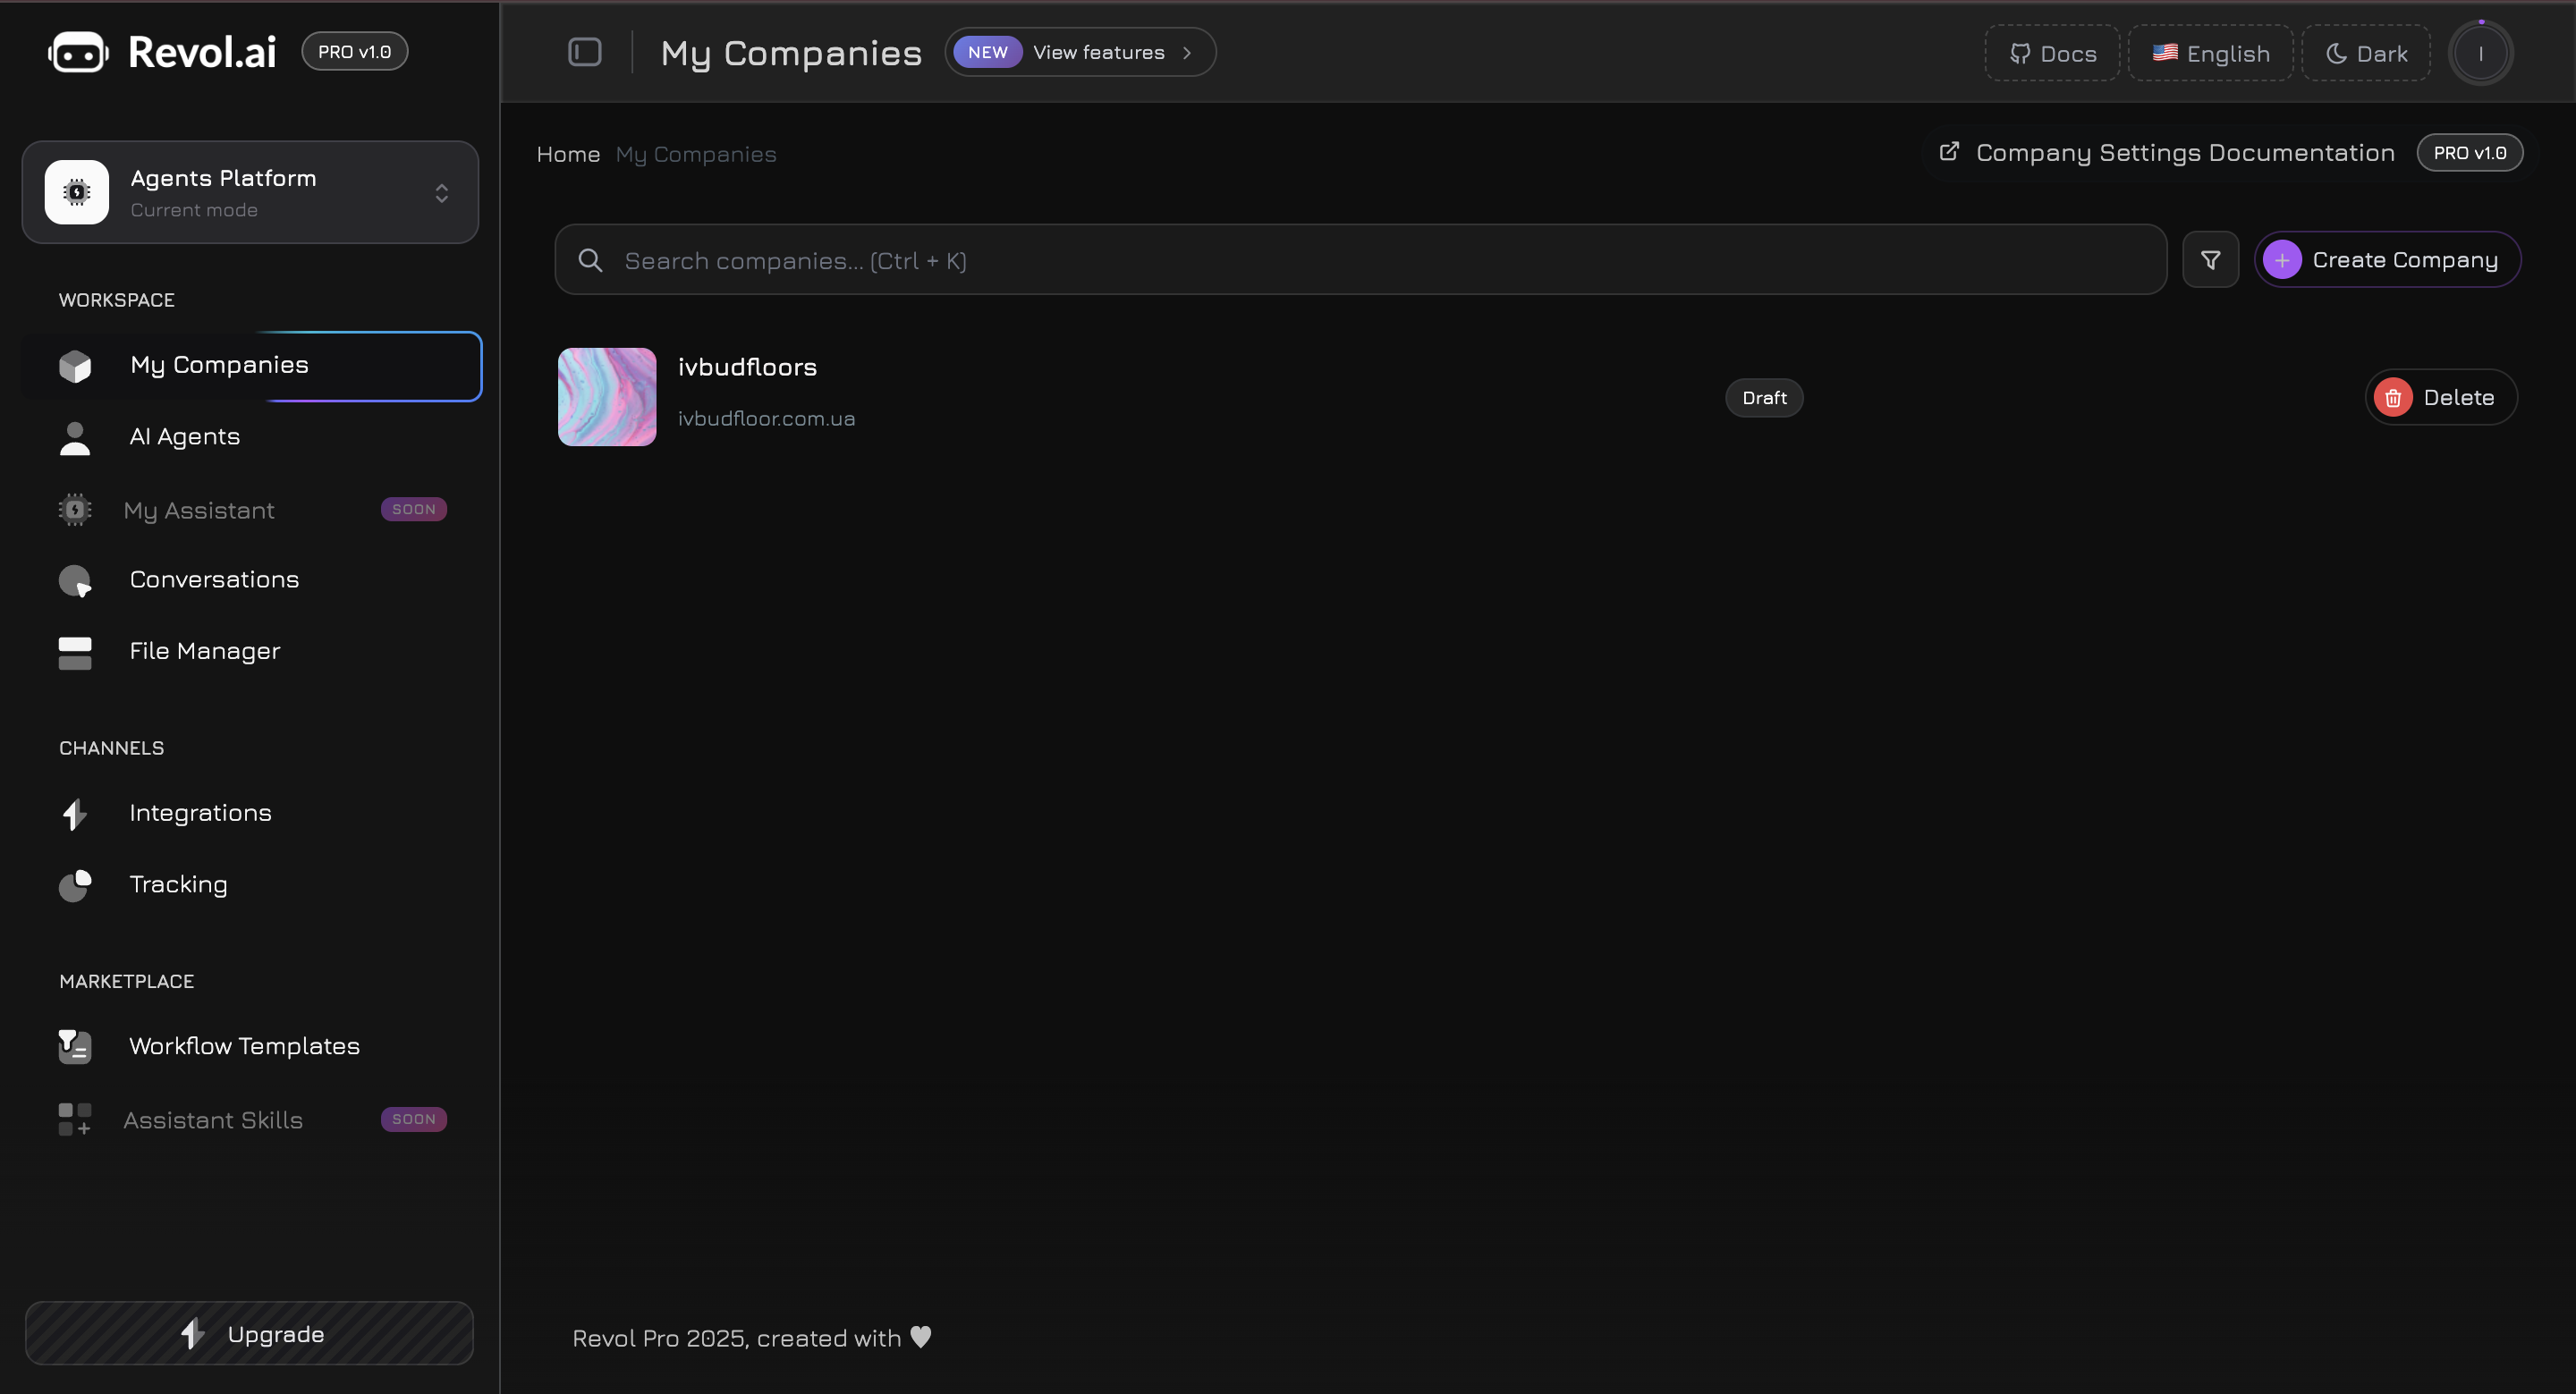
Creacion de una Empresa
Despues de iniciar sesion, lo primero que debe hacer es crear una empresa. Una empresa es la entidad central en Revol, a la cual se vinculan todos los demas elementos: productos, archivos, agentes, integraciones, analiticas. Para crear una empresa, complete:| Campo | Descripcion |
|---|---|
| Nombre de la Empresa | Marca o nombre comercial |
| Sitio Web | URL de su sitio web (utilizado para la validacion del dominio del widget) |
| Telefono | Numero de contacto de la empresa |
| Logotipo | Imagen que se mostrara en el widget y el panel de control |
| Descripcion Promocional | Breve descripcion de su negocio |
Por que una empresa y no solo un agente?
La mayoria de las plataformas de chatbots con IA funcionan con un enfoque simple: usted crea un agente, sube archivos PDF y este responde preguntas basandose en esos documentos. Esto funciona para bots de preguntas frecuentes simples, pero rapidamente se convierte en una limitacion para negocios reales. Revol esta construido de manera diferente. Utilizamos un modelo de datos estructurado: empresa -> productos/servicios -> parametros de producto. He aqui por que:Datos estructurados = respuestas mas precisas
Datos estructurados = respuestas mas precisas
Cuando un agente de IA sabe que “iPhone 15 Pro” es un producto especifico con un precio de $999, con 8 colores y un estado de “en stock”, responde con hechos en lugar de interpretar texto de un PDF. Sin alucinaciones sobre precios que han cambiado o productos que estan agotados.
Los parametros son el lenguaje de su negocio
Los parametros son el lenguaje de su negocio
Cada negocio tiene sus propias caracteristicas clave. Para una tienda en linea — talla, color, material. Para una clinica — duracion del procedimiento, contraindicaciones. Para SaaS — limites del plan, integraciones compatibles. Los parametros de producto le permiten describir estos detalles de forma estructurada, y el agente los utiliza para respuestas precisas y contextuales.
Un conjunto de datos — multiples agentes
Un conjunto de datos — multiples agentes
Usted completa el catalogo de productos una vez, luego crea multiples agentes con diferentes roles: uno para ventas, otro para soporte, un tercero para capacitacion interna. Cada agente elige que productos y archivos especificos utiliza. Sin duplicacion de datos.
Escalabilidad para agencias
Escalabilidad para agencias
Si gestiona multiples negocios o trabaja como agencia — cada empresa tiene datos aislados, agentes separados y sus propias analiticas. Una unica cuenta de Revol puede atender a docenas de empresas.
Productos y Servicios
Despues de crear una empresa, agregue productos o servicios — estas son las unidades fundamentales que su agente de IA conocera y sobre las que informara a los clientes. Para crear un producto, especifique:| Campo | Descripcion |
|---|---|
| Nombre | Nombre del servicio o producto |
| Enlace | URL de la pagina del producto en su sitio web (opcional) |
| Disponibilidad | Si el producto esta disponible para pedidos |
- Agregar una descripcion detallada (prompt) — texto extenso sobre el producto que el agente utilizara para las respuestas
- Establecer el precio
- Cargar fotos del producto
- Agregar archivos a la base de conocimientos del producto (documentos, enlaces, texto, videos)

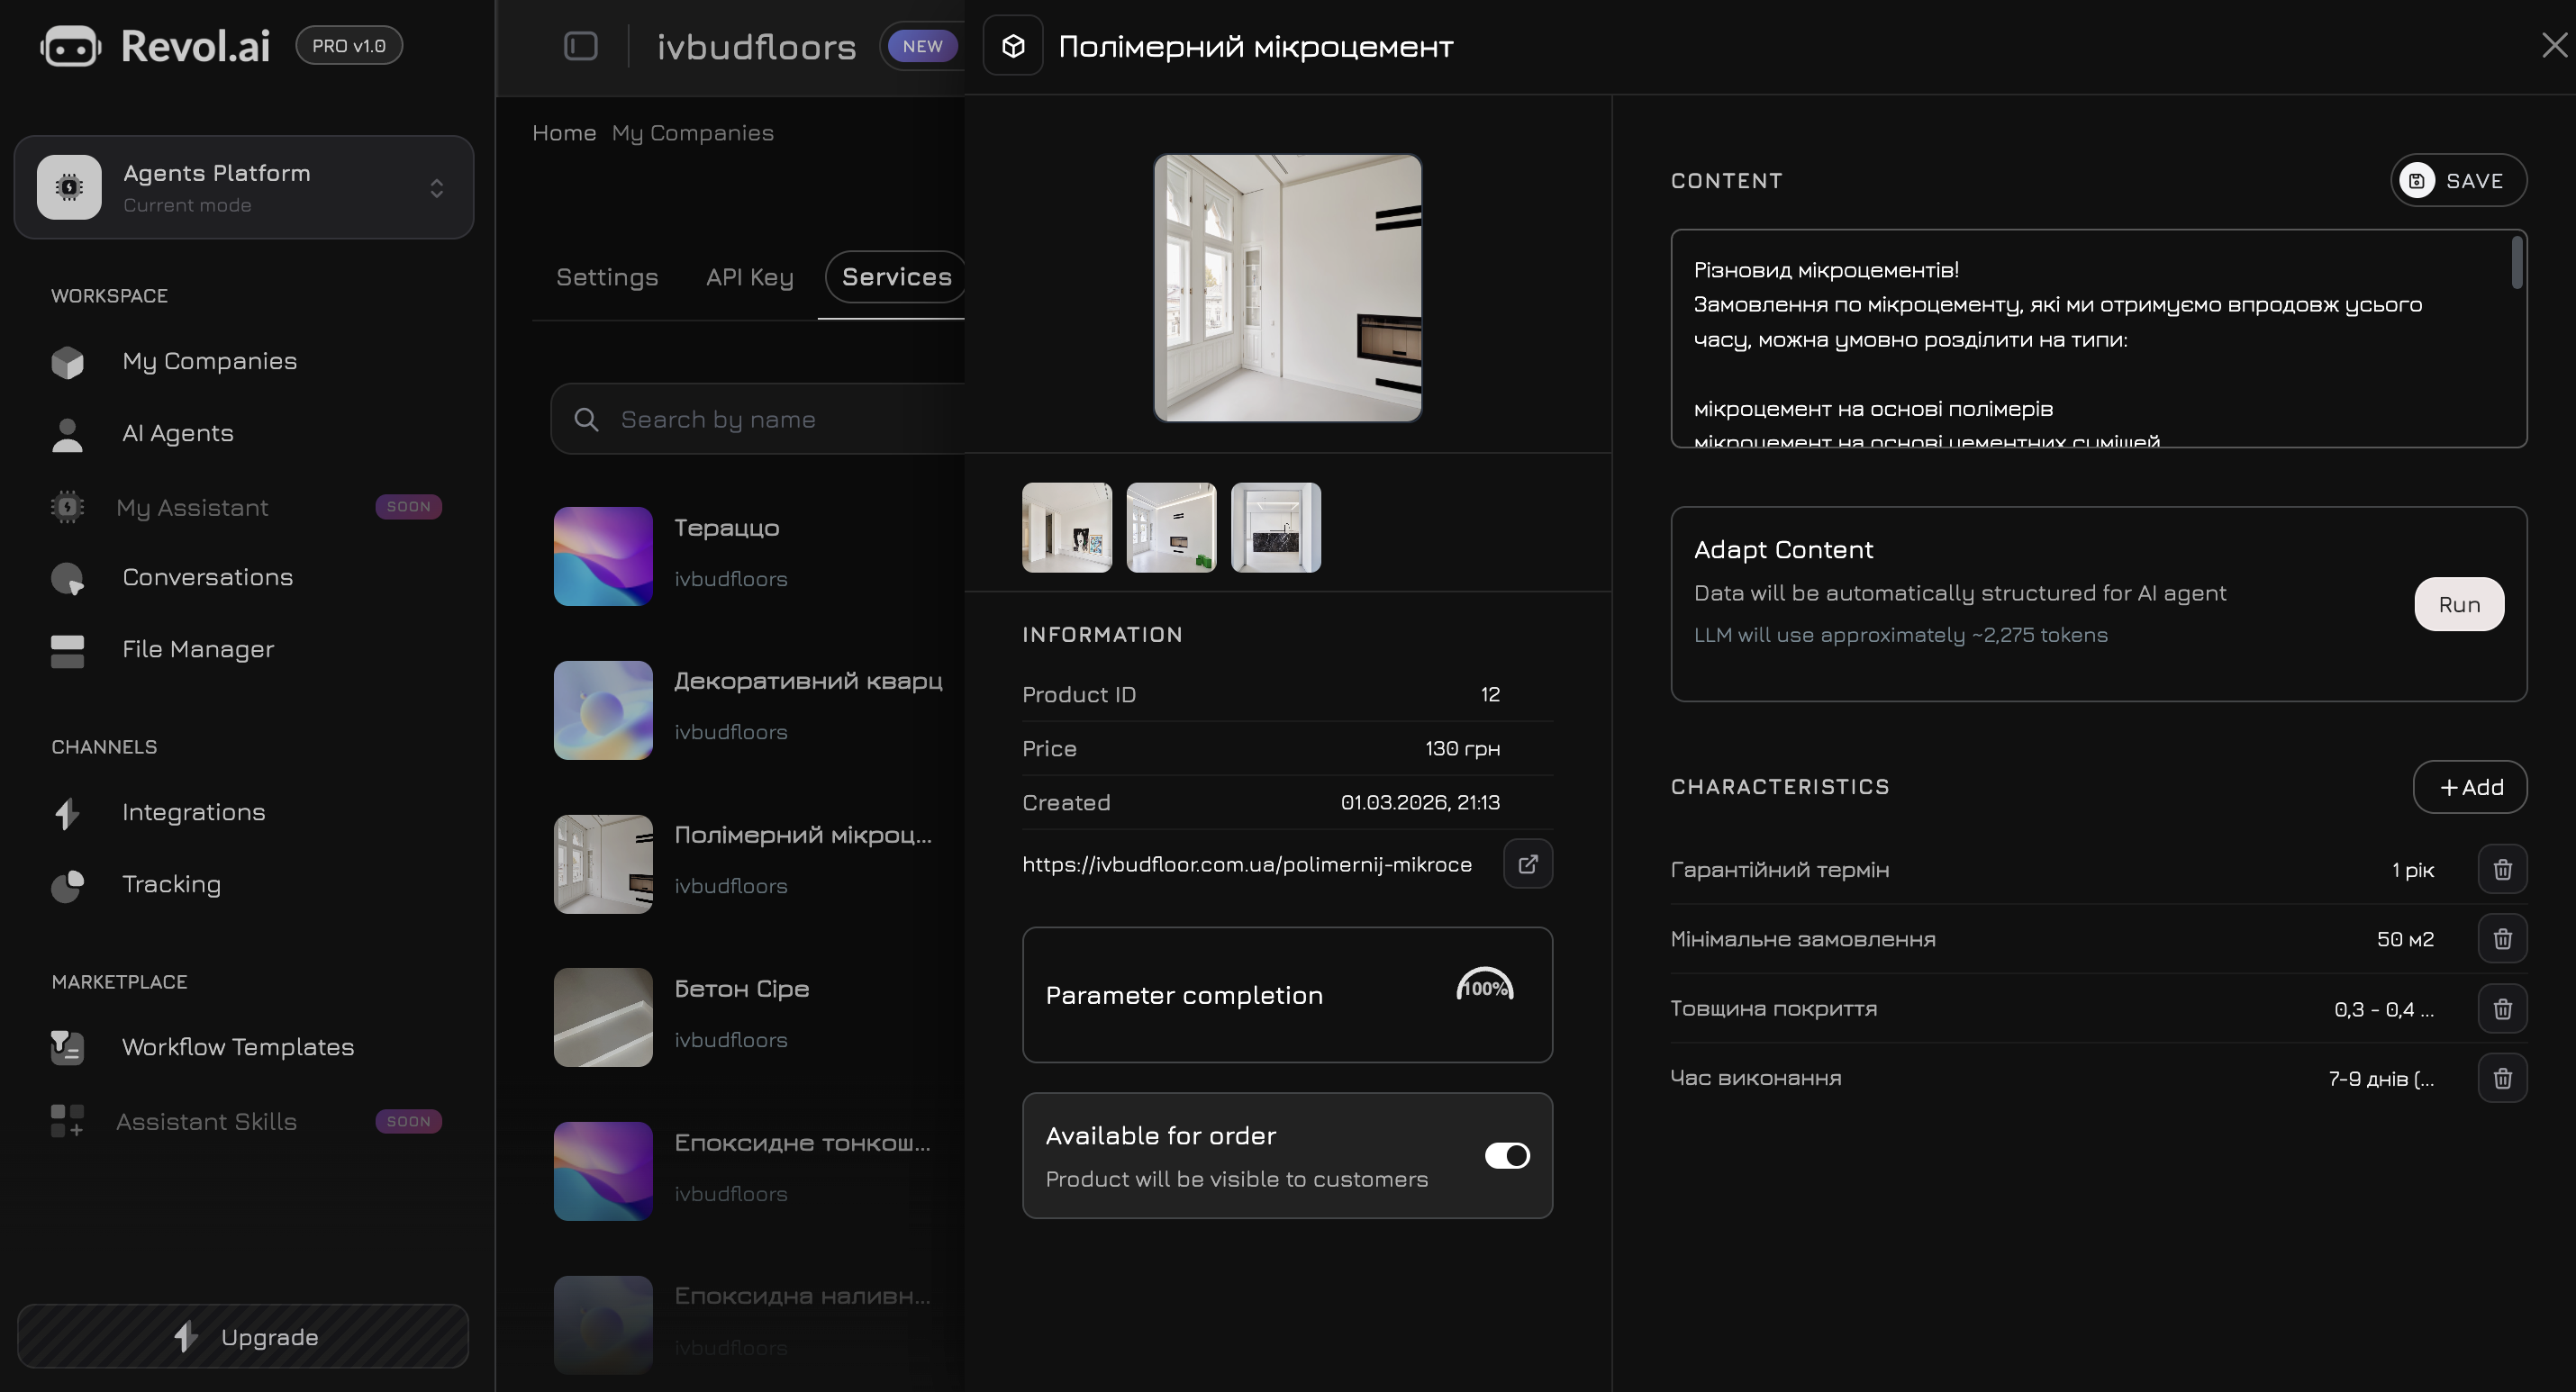
Parametros de Producto
La parte mas potente del modelo de producto son los parametros. Estos son pares estructurados de “nombre — valor” que describen caracteristicas especificas del producto. Ejemplos de parametros para diferentes negocios:- Tienda en Linea
- Clinica / Salon
- SaaS / TI
| Parametro | Valor |
|---|---|
| Talla | S, M, L, XL |
| Color | Negro, Blanco, Azul |
| Material | 100% algodon |
| Peso | 250 g |
| Garantia | 12 meses |
- Precision — valores especificos en lugar de formulaciones vagas
- Informacion actualizada — cambie un parametro en un solo lugar y el agente responde inmediatamente con la informacion actualizada
- Comparacion — el agente puede comparar productos por parametros especificos
Gestor de Archivos
El Gestor de Archivos es el almacenamiento centralizado de todos los archivos de su empresa. Aqui es donde carga el contenido que se utilizara para entrenar a los agentes de IA. Vaya al Gestor de Archivos en el menu lateral. Vera una lista de empresas — seleccione la que necesite para abrir sus archivos.Tipos de Contenido
- Documentos
- Enlaces
- Texto
- Video
- Fotos
Cargue archivos en formatos PDF, DOCX, TXT. Revol extraera automaticamente el texto, lo dividira en fragmentos y creara embeddings vectoriales para la busqueda semantica.
| Formato | Tamano Maximo | Que se Extrae |
|---|---|---|
| 10 MB | Texto de todas las paginas | |
| DOCX | 10 MB | Texto con formato |
| TXT | 5 MB | Texto completo |

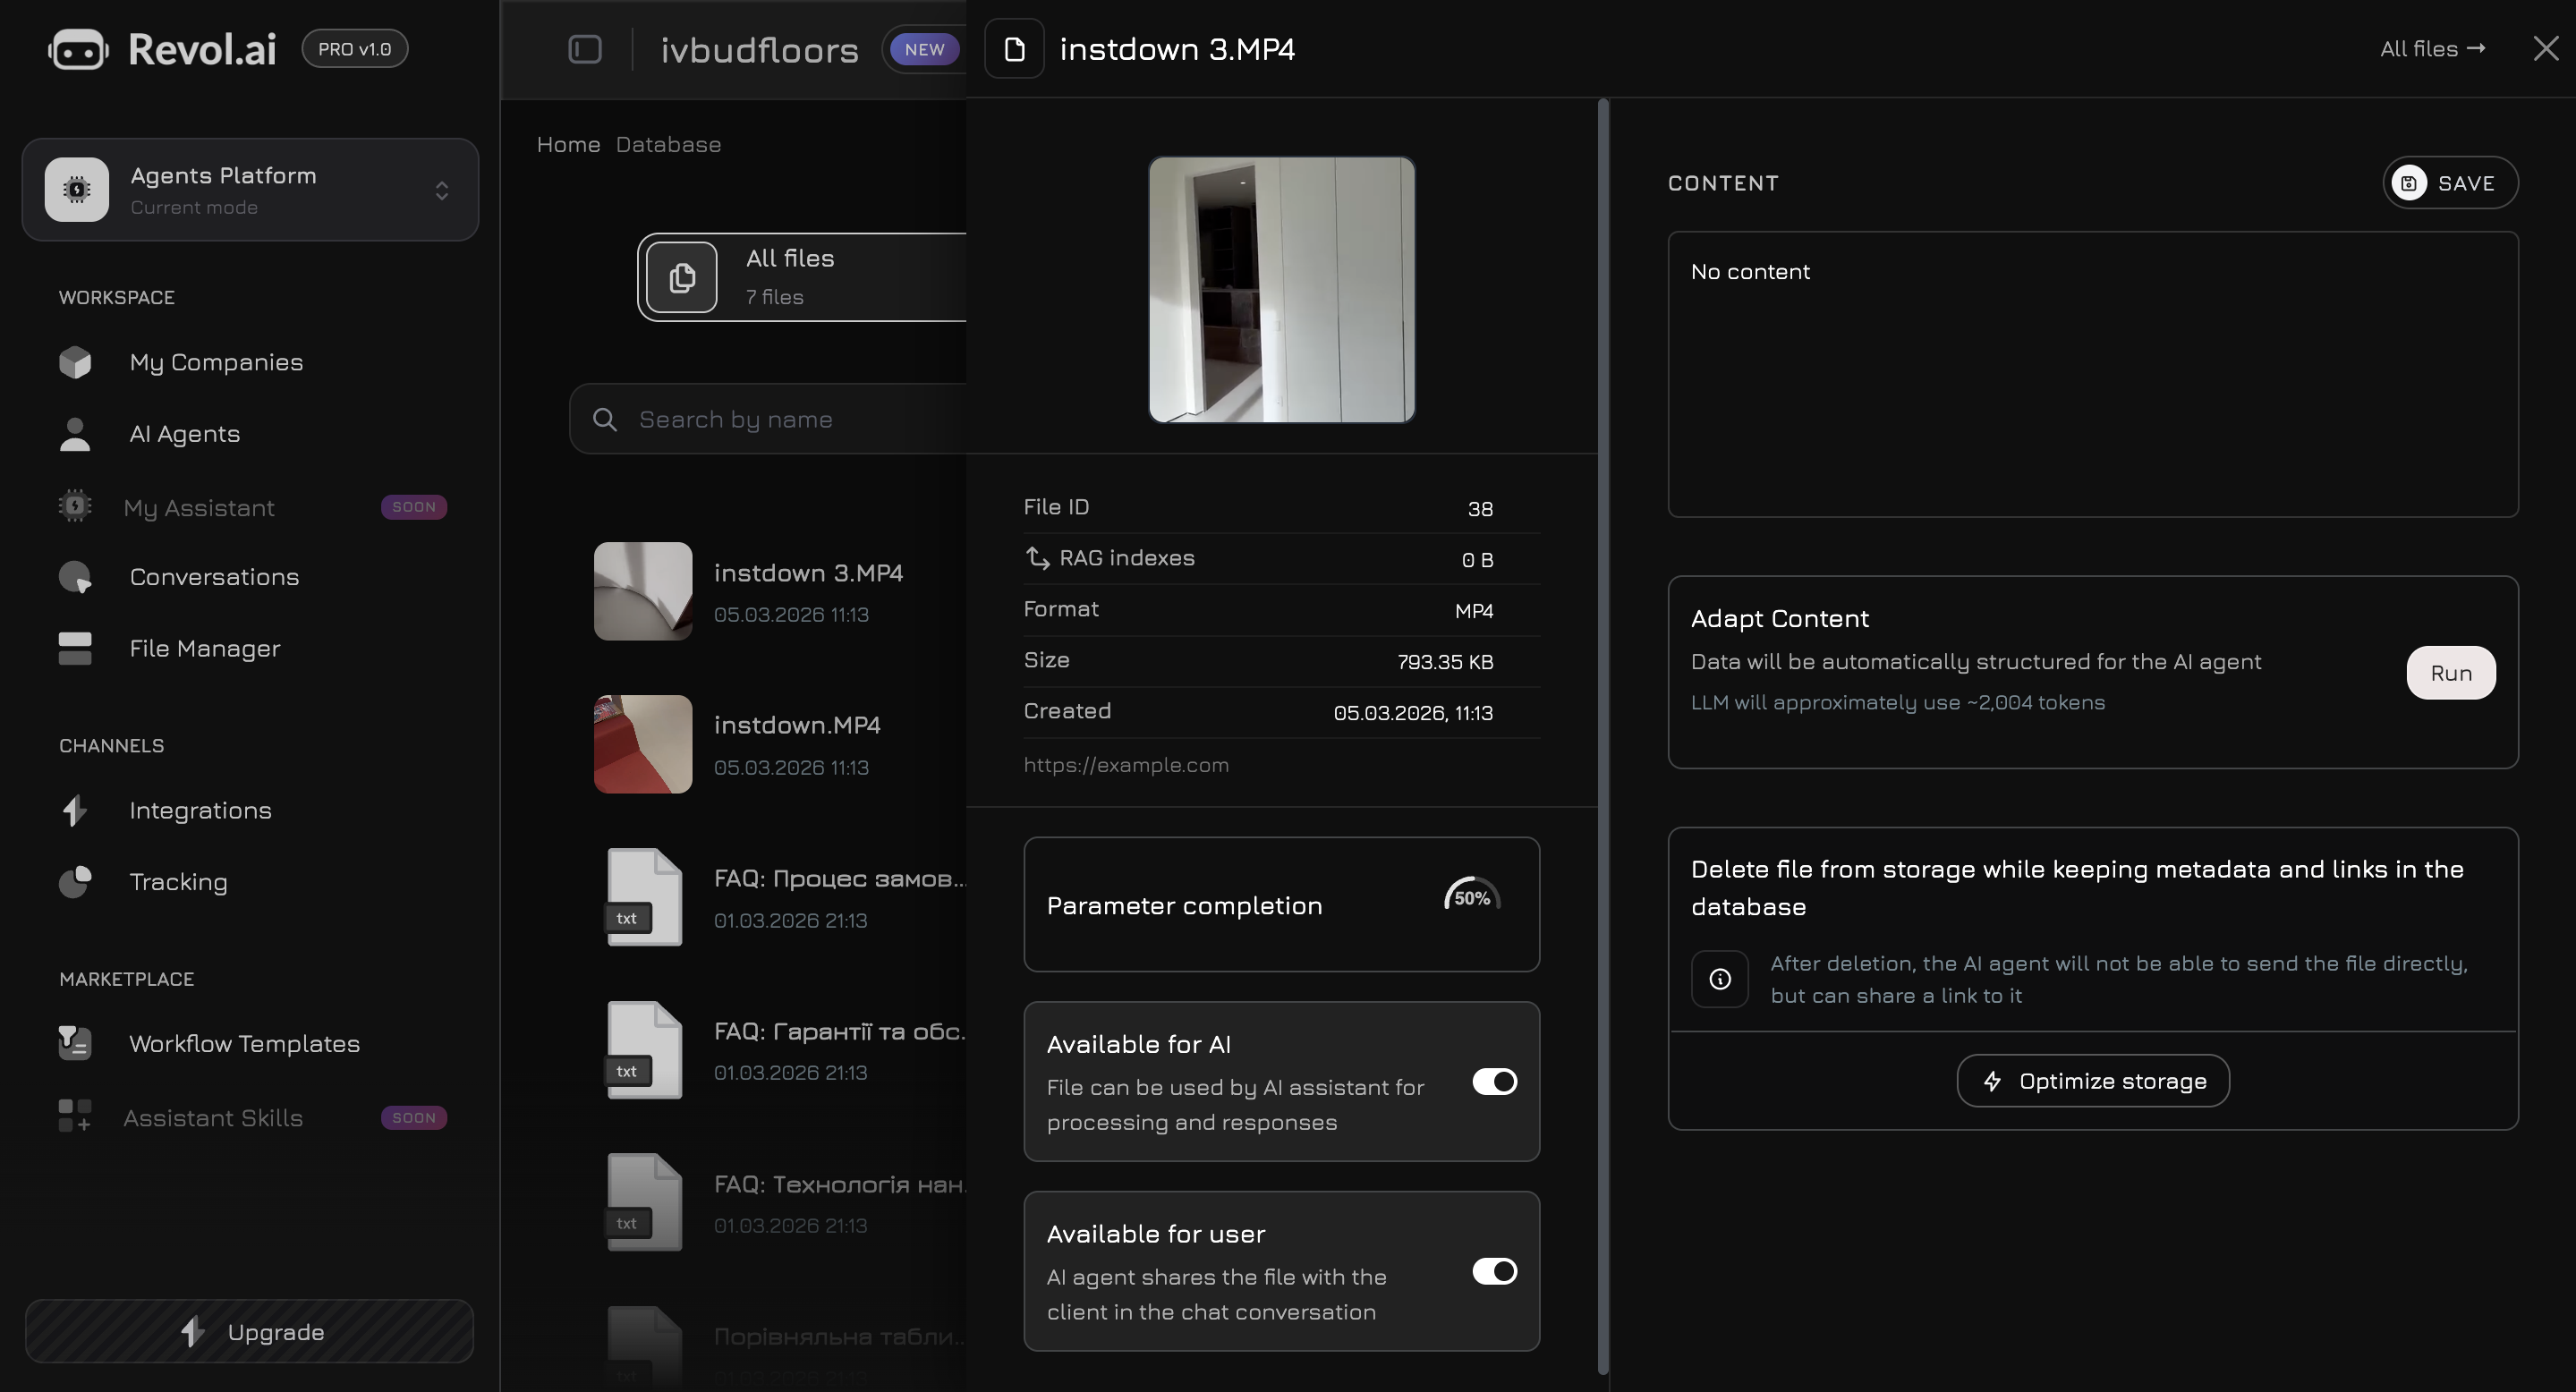
Los archivos se pueden agregar tanto a nivel de empresa (disponibles para todos los agentes) como a nivel de producto individual (vinculados a un producto/servicio especifico).
Creacion de un Agente de IA
Ahora que tiene una empresa con productos y archivos — es hora de crear un agente de IA. Vaya a Agentes de IA en el menu lateral y haga clic en Crear Agente.Configuracion Basica
| Campo | Descripcion |
|---|---|
| Nombre | Nombre del agente (ej., “Consultor de Ventas”) |
| Empresa | A que empresa pertenece el agente |
| Caso de Uso | Rol del agente: Ventas, Soporte, Generacion de Leads, Programacion de Citas, Personalizado |
| Proveedor LLM | Proveedor del modelo de IA |
| Modelo | Modelo especifico a utilizar |
Proveedores LLM Disponibles
OpenAI
GPT-4o, GPT-4o-mini — la opcion mas popular para la mayoria de las tareas
Anthropic
Claude Sonnet, Claude Haiku — excelente calidad de respuesta y seguridad
Gemini 2.0 Flash, Gemini 2.5 Pro — modelos rapidos y eficientes
Groq
Llama 3.1 8B, Llama 3.3 70B — inferencia mas rapida, modelos de codigo abierto
Prompt del Sistema
Despues de crear el agente, se abre un panel de configuracion a pantalla completa. El primer paso es escribir un Prompt del Sistema — la instruccion principal que define el comportamiento del agente.Base de Conocimientos del Agente
Navegue a la pestana Conocimiento en el panel del agente. Aqui elige que datos especificos utilizara el agente para las respuestas.Fuentes de Conocimiento
El agente puede aprender de dos tipos de fuentes:Productos de la Empresa
Productos de la Empresa
Seleccione productos o servicios especificos que el agente debe conocer. El agente obtendra acceso a nombres, descripciones, precios, parametros y fotos de los productos seleccionados.
Archivos de la Base de Conocimientos
Archivos de la Base de Conocimientos
Seleccione documentos, enlaces, textos y videos del Gestor de Archivos. Puede elegir archivos tanto a nivel de empresa como los vinculados a productos especificos.
Entrenamiento
Despues de seleccionar las fuentes, haga clic en Entrenar. Revol:- Extraera todo el contenido de texto de las fuentes seleccionadas
- Lo dividira en fragmentos optimos
- Creara embeddings vectoriales a traves de OpenAI text-embedding-3-small
- Los almacenara en PostgreSQL con pgvector para busqueda semantica
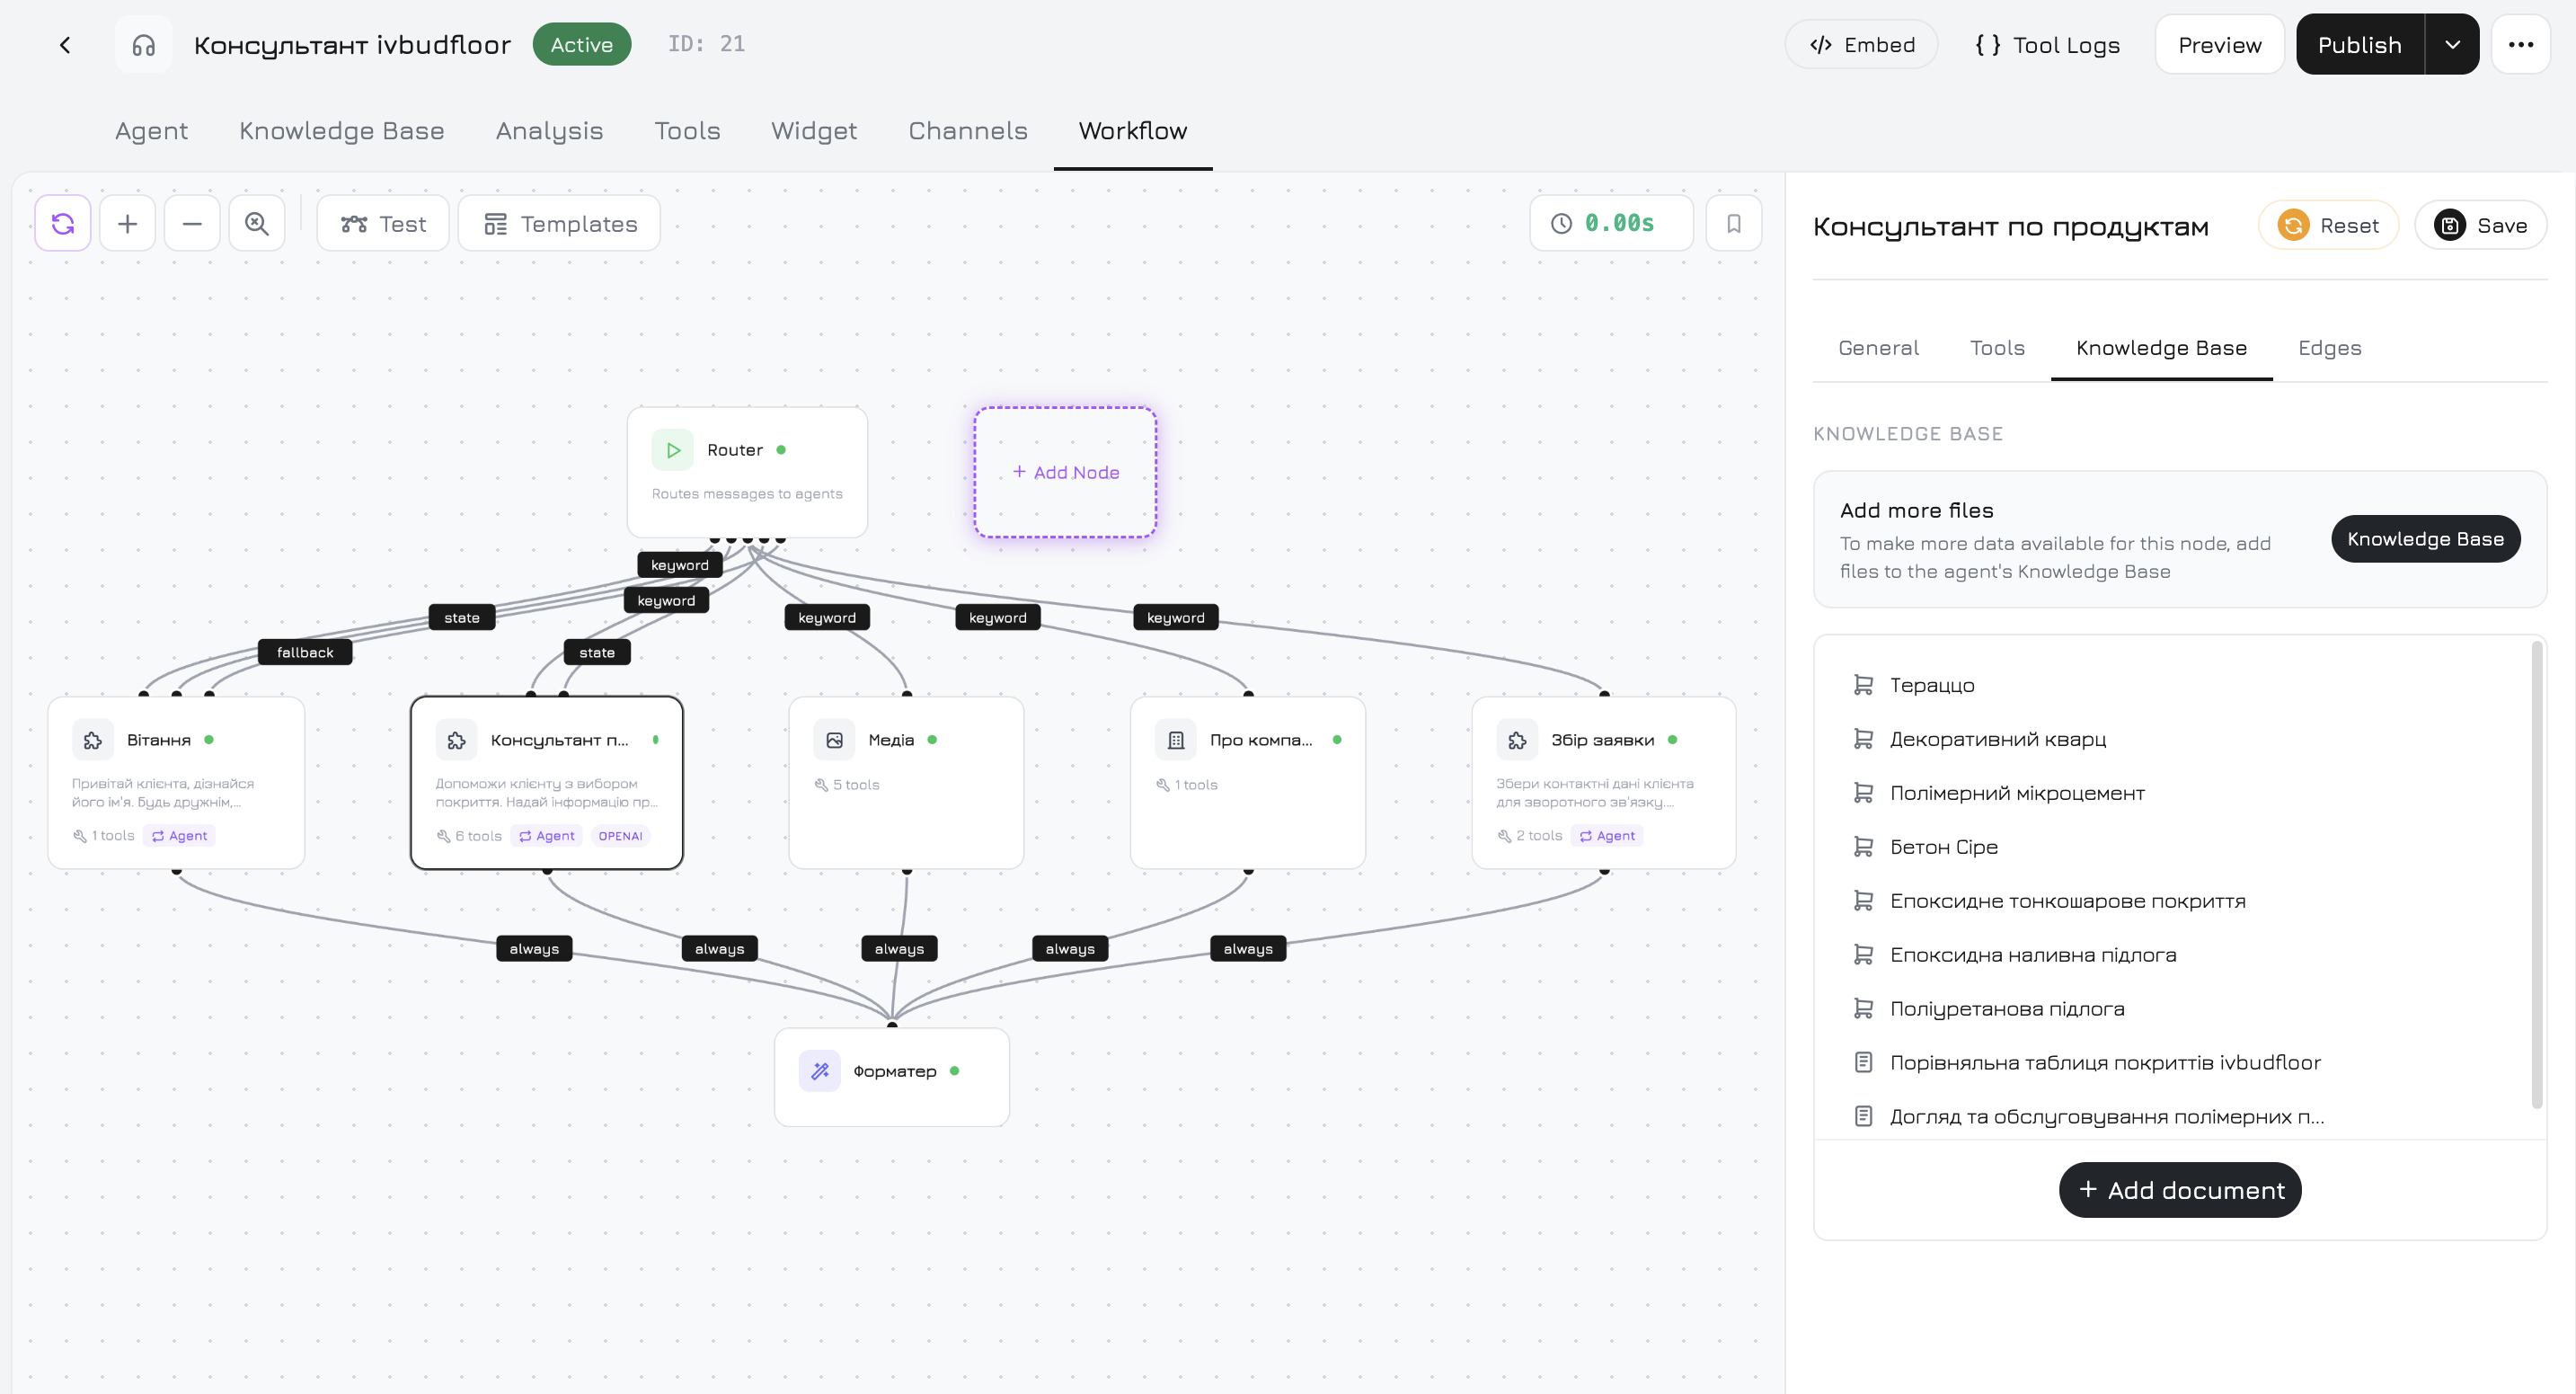
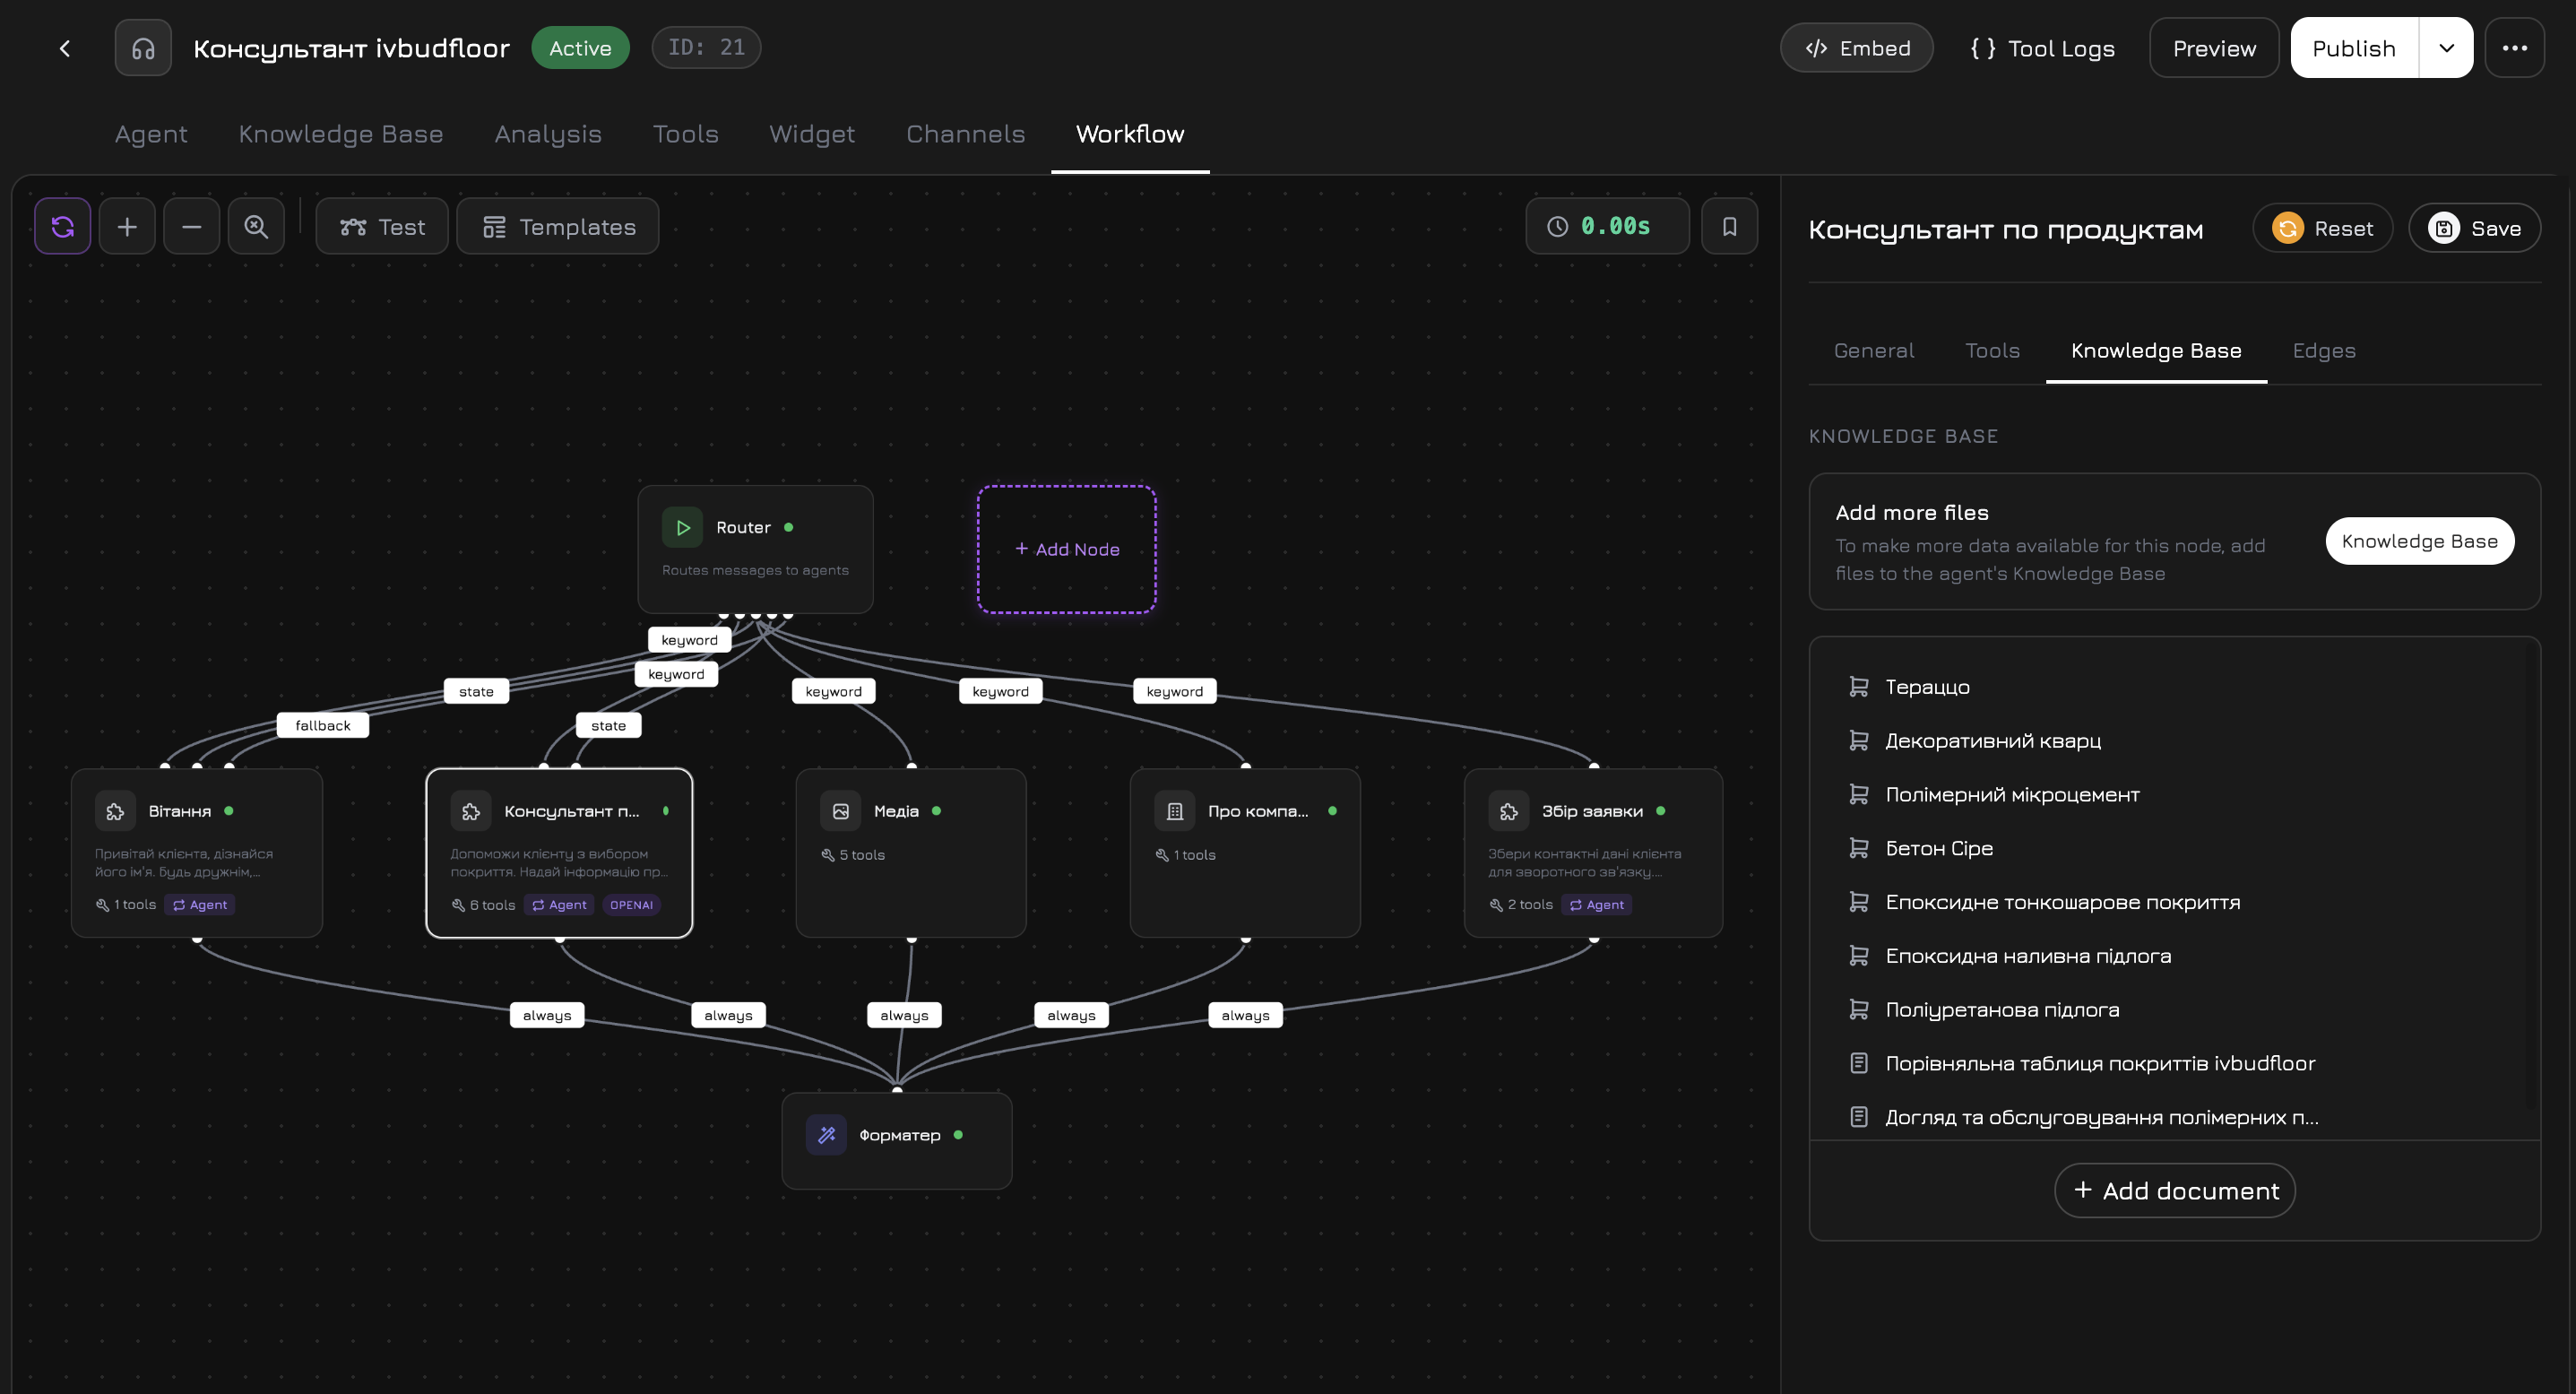
Prueba del Agente
Antes de publicar, pruebe el agente directamente en el panel de control. Haga clic en el boton Vista Previa en el panel superior del agente — se abrira una ventana de chat integrada.Flujo de Trabajo Basico
Cada nuevo agente viene con un flujo de trabajo predefinido que cubre las necesidades basicas sin configuracion adicional. Su estructura:| Nodo | Que Hace | Herramientas |
|---|---|---|
| Start | Punto de entrada — recibe el mensaje del usuario | — |
| Product Agent | Busca productos, detalles, disponibilidad, parametros | get_products, get_product_details, check_availability, search_by_parameters |
| Media Agent | Encuentra fotos, videos y documentos de la base de conocimientos | get_photos, get_videos, get_documents, search_documents |
| Company Agent | Responde preguntas generales sobre la empresa | get_company_info |
| Response Formatter | Recopila respuestas de todos los agentes y forma el mensaje final | — |
| Voice Input / Output | STT y TTS para modo de voz (desactivado por defecto) | — |
Que Verificar
Respuestas Basicas
Pregunte sobre sus productos y servicios. Asegurese de que el agente responda con precision y utilice datos de la base de conocimientos.
Limites del Conocimiento
Pregunte algo que no este en la base de conocimientos. El agente debe decir honestamente que no tiene esa informacion en lugar de inventar una respuesta.
Tono y Estilo
Verifique si el tono de comunicacion coincide con su prompt del sistema — cortesia, idioma, formalidad.
Instalacion del Widget
Cuando el agente este listo — instale el widget en su sitio web. Haga clic en el boton Integrar en el panel superior del agente.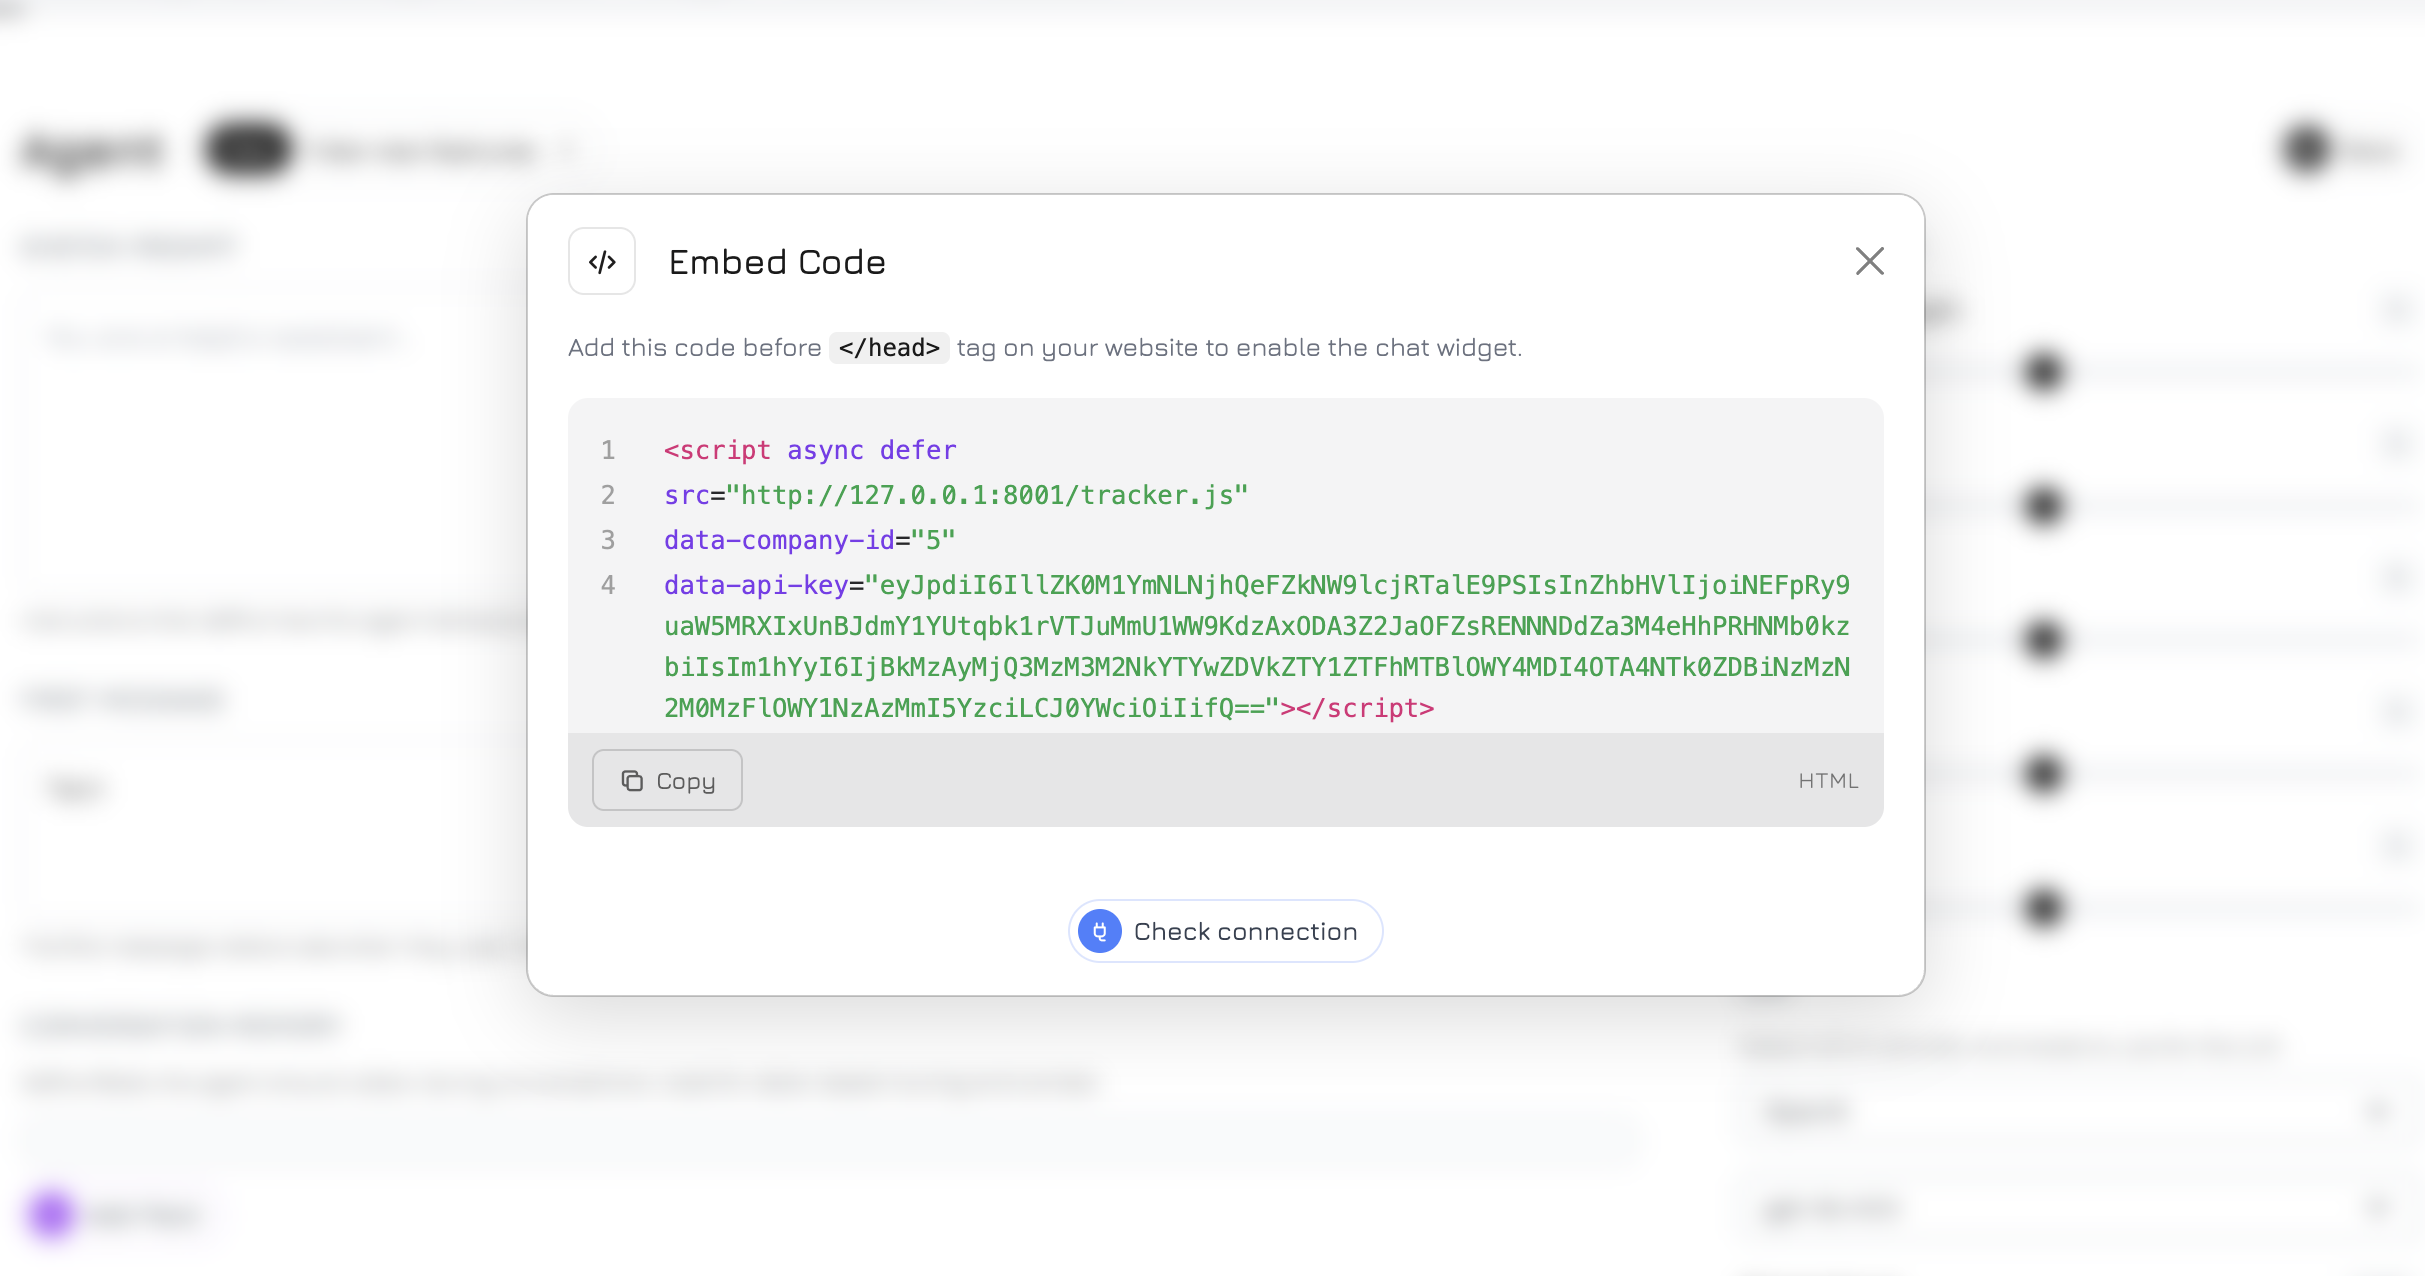
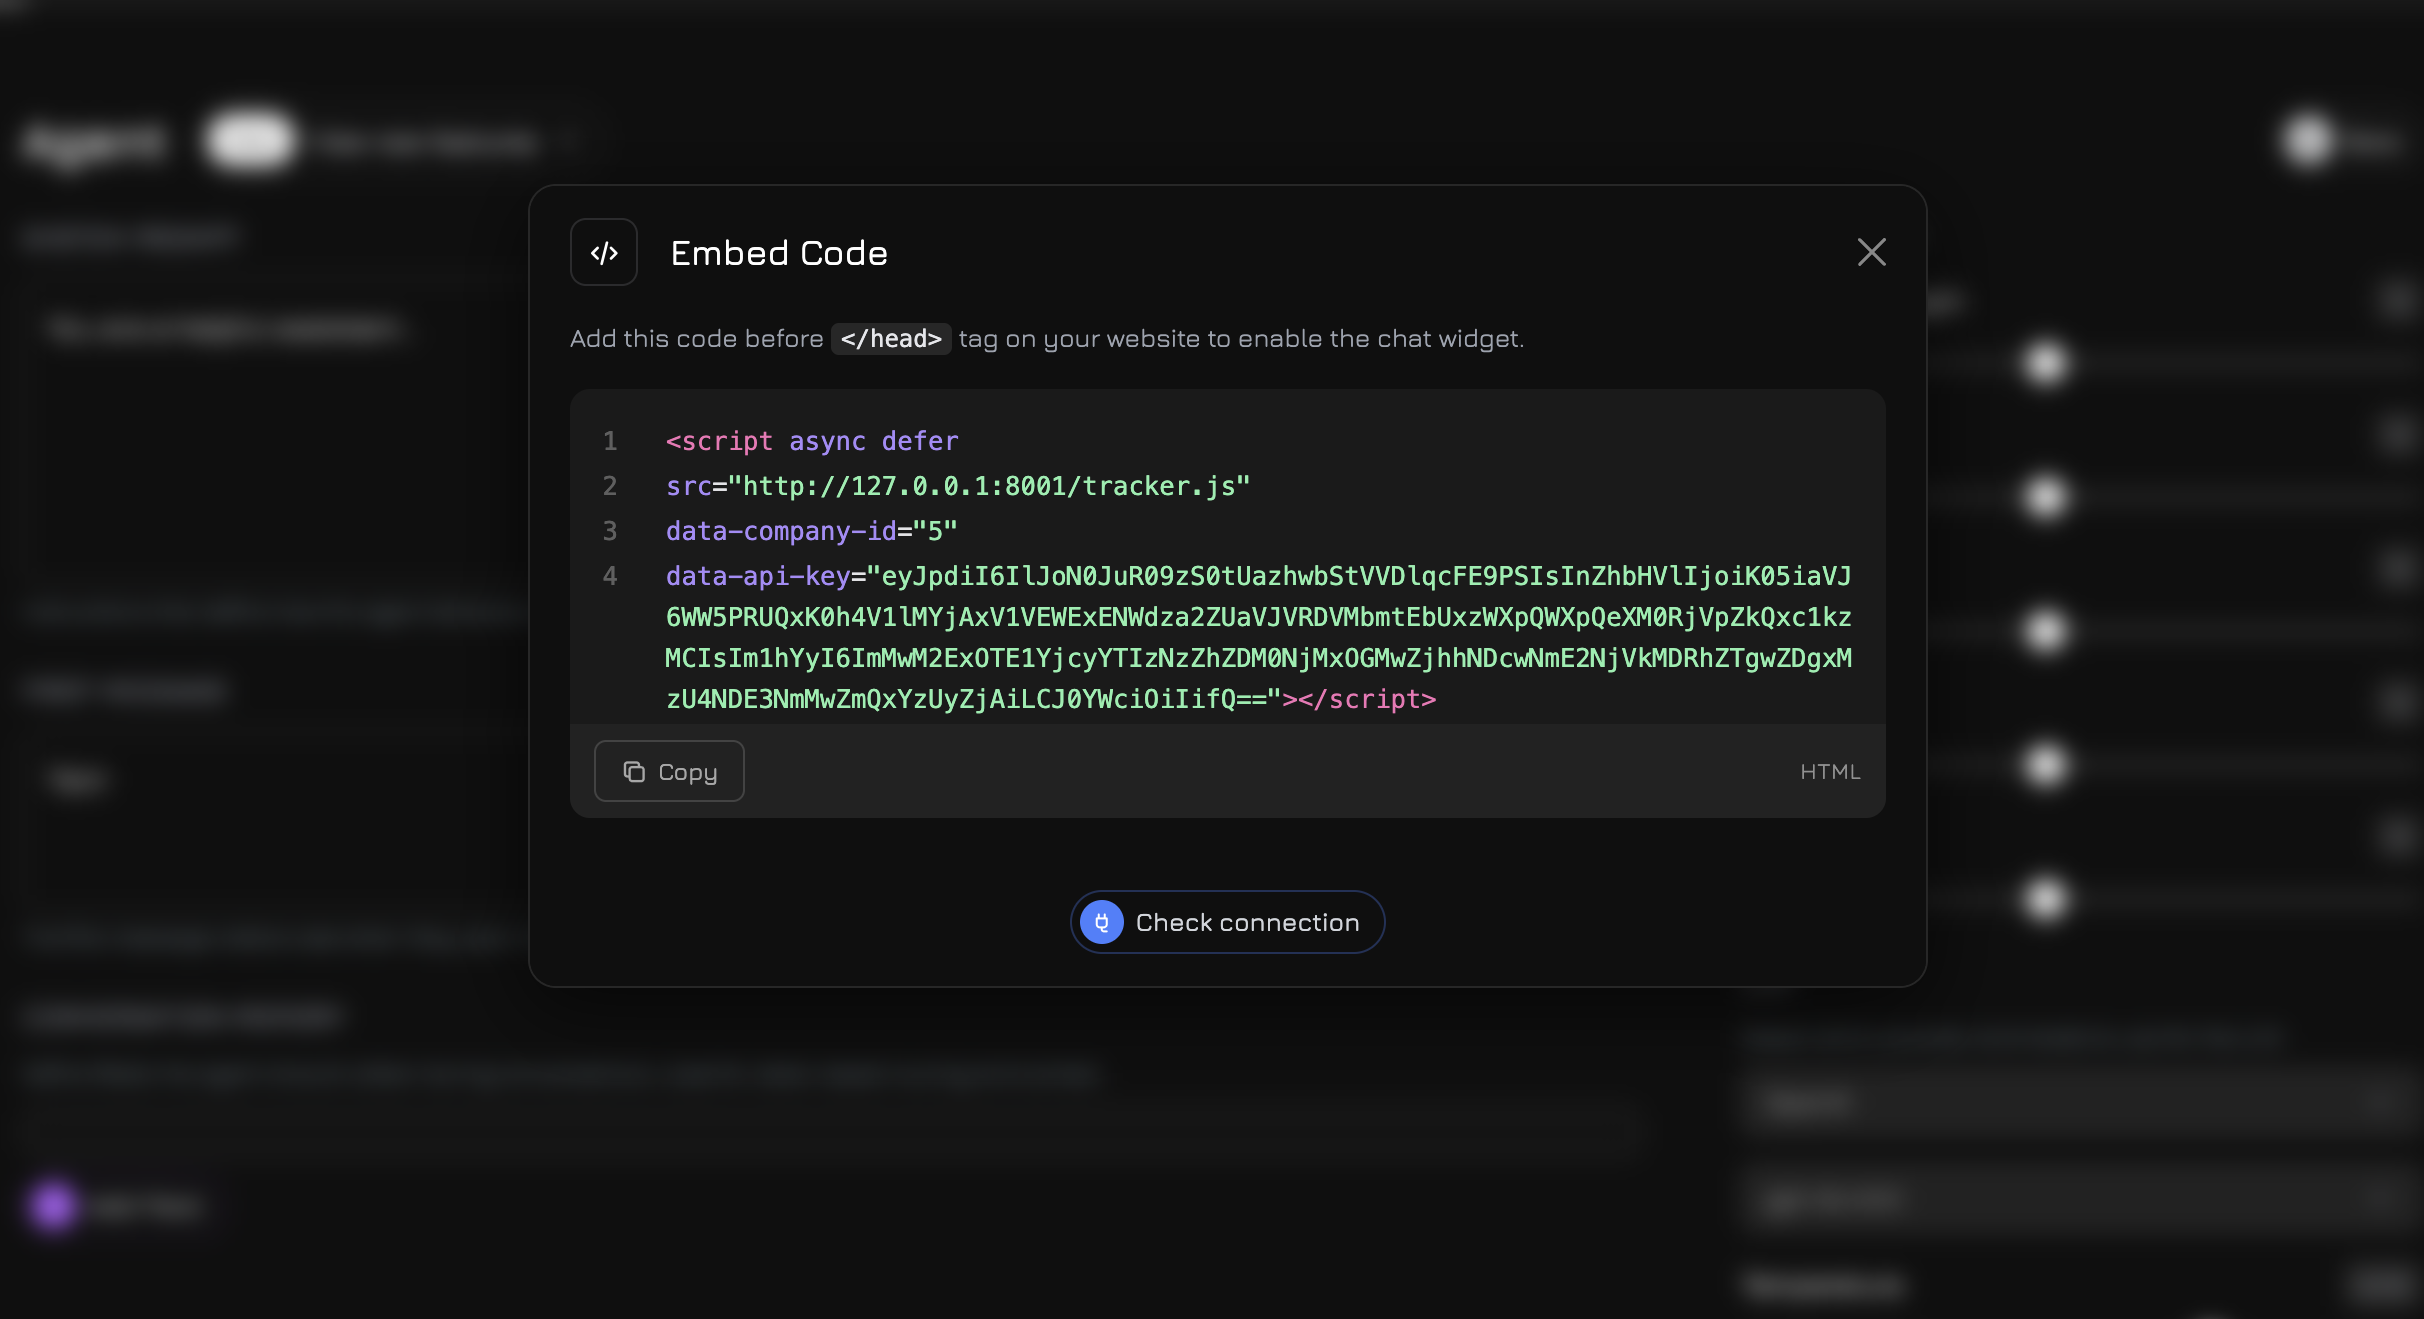
Obtener el Codigo
- Haga clic en Generar Clave API (si aun no se ha creado una clave)
- Copie el codigo HTML del widget
Agregar a su Sitio Web
Agregue este codigo antes de la etiqueta de cierre</head> en su sitio web:
- Widget de chat — un boton en la esquina del sitio para comunicarse con el agente
- Seguimiento de visitantes — sesiones, paginas, eventos, etiquetas UTM
- Comunicacion por voz — si esta habilitada para el agente
El widget se renderiza en Shadow DOM — sus estilos estan completamente aislados de su sitio web y viceversa. Sin conflictos de CSS.
Verificar la Conexion
Despues de instalar el script, regrese al modal de Codigo de Integracion y haga clic en Verificar Conexion. Revol verificara que el widget esta correctamente conectado a su sitio web.Proximos Pasos
Editor de Flujos de Trabajo
Cree escenarios de conversacion complejos con condiciones, ramificaciones y llamadas a herramientas
Integraciones
Conecte Telegram, WhatsApp, telefonia y otros canales
Personalizacion del Widget
Cambie colores, textos, ubicacion y la apariencia del widget
Analiticas y Seguimiento
Rastree sesiones de visitantes, eventos y conversiones