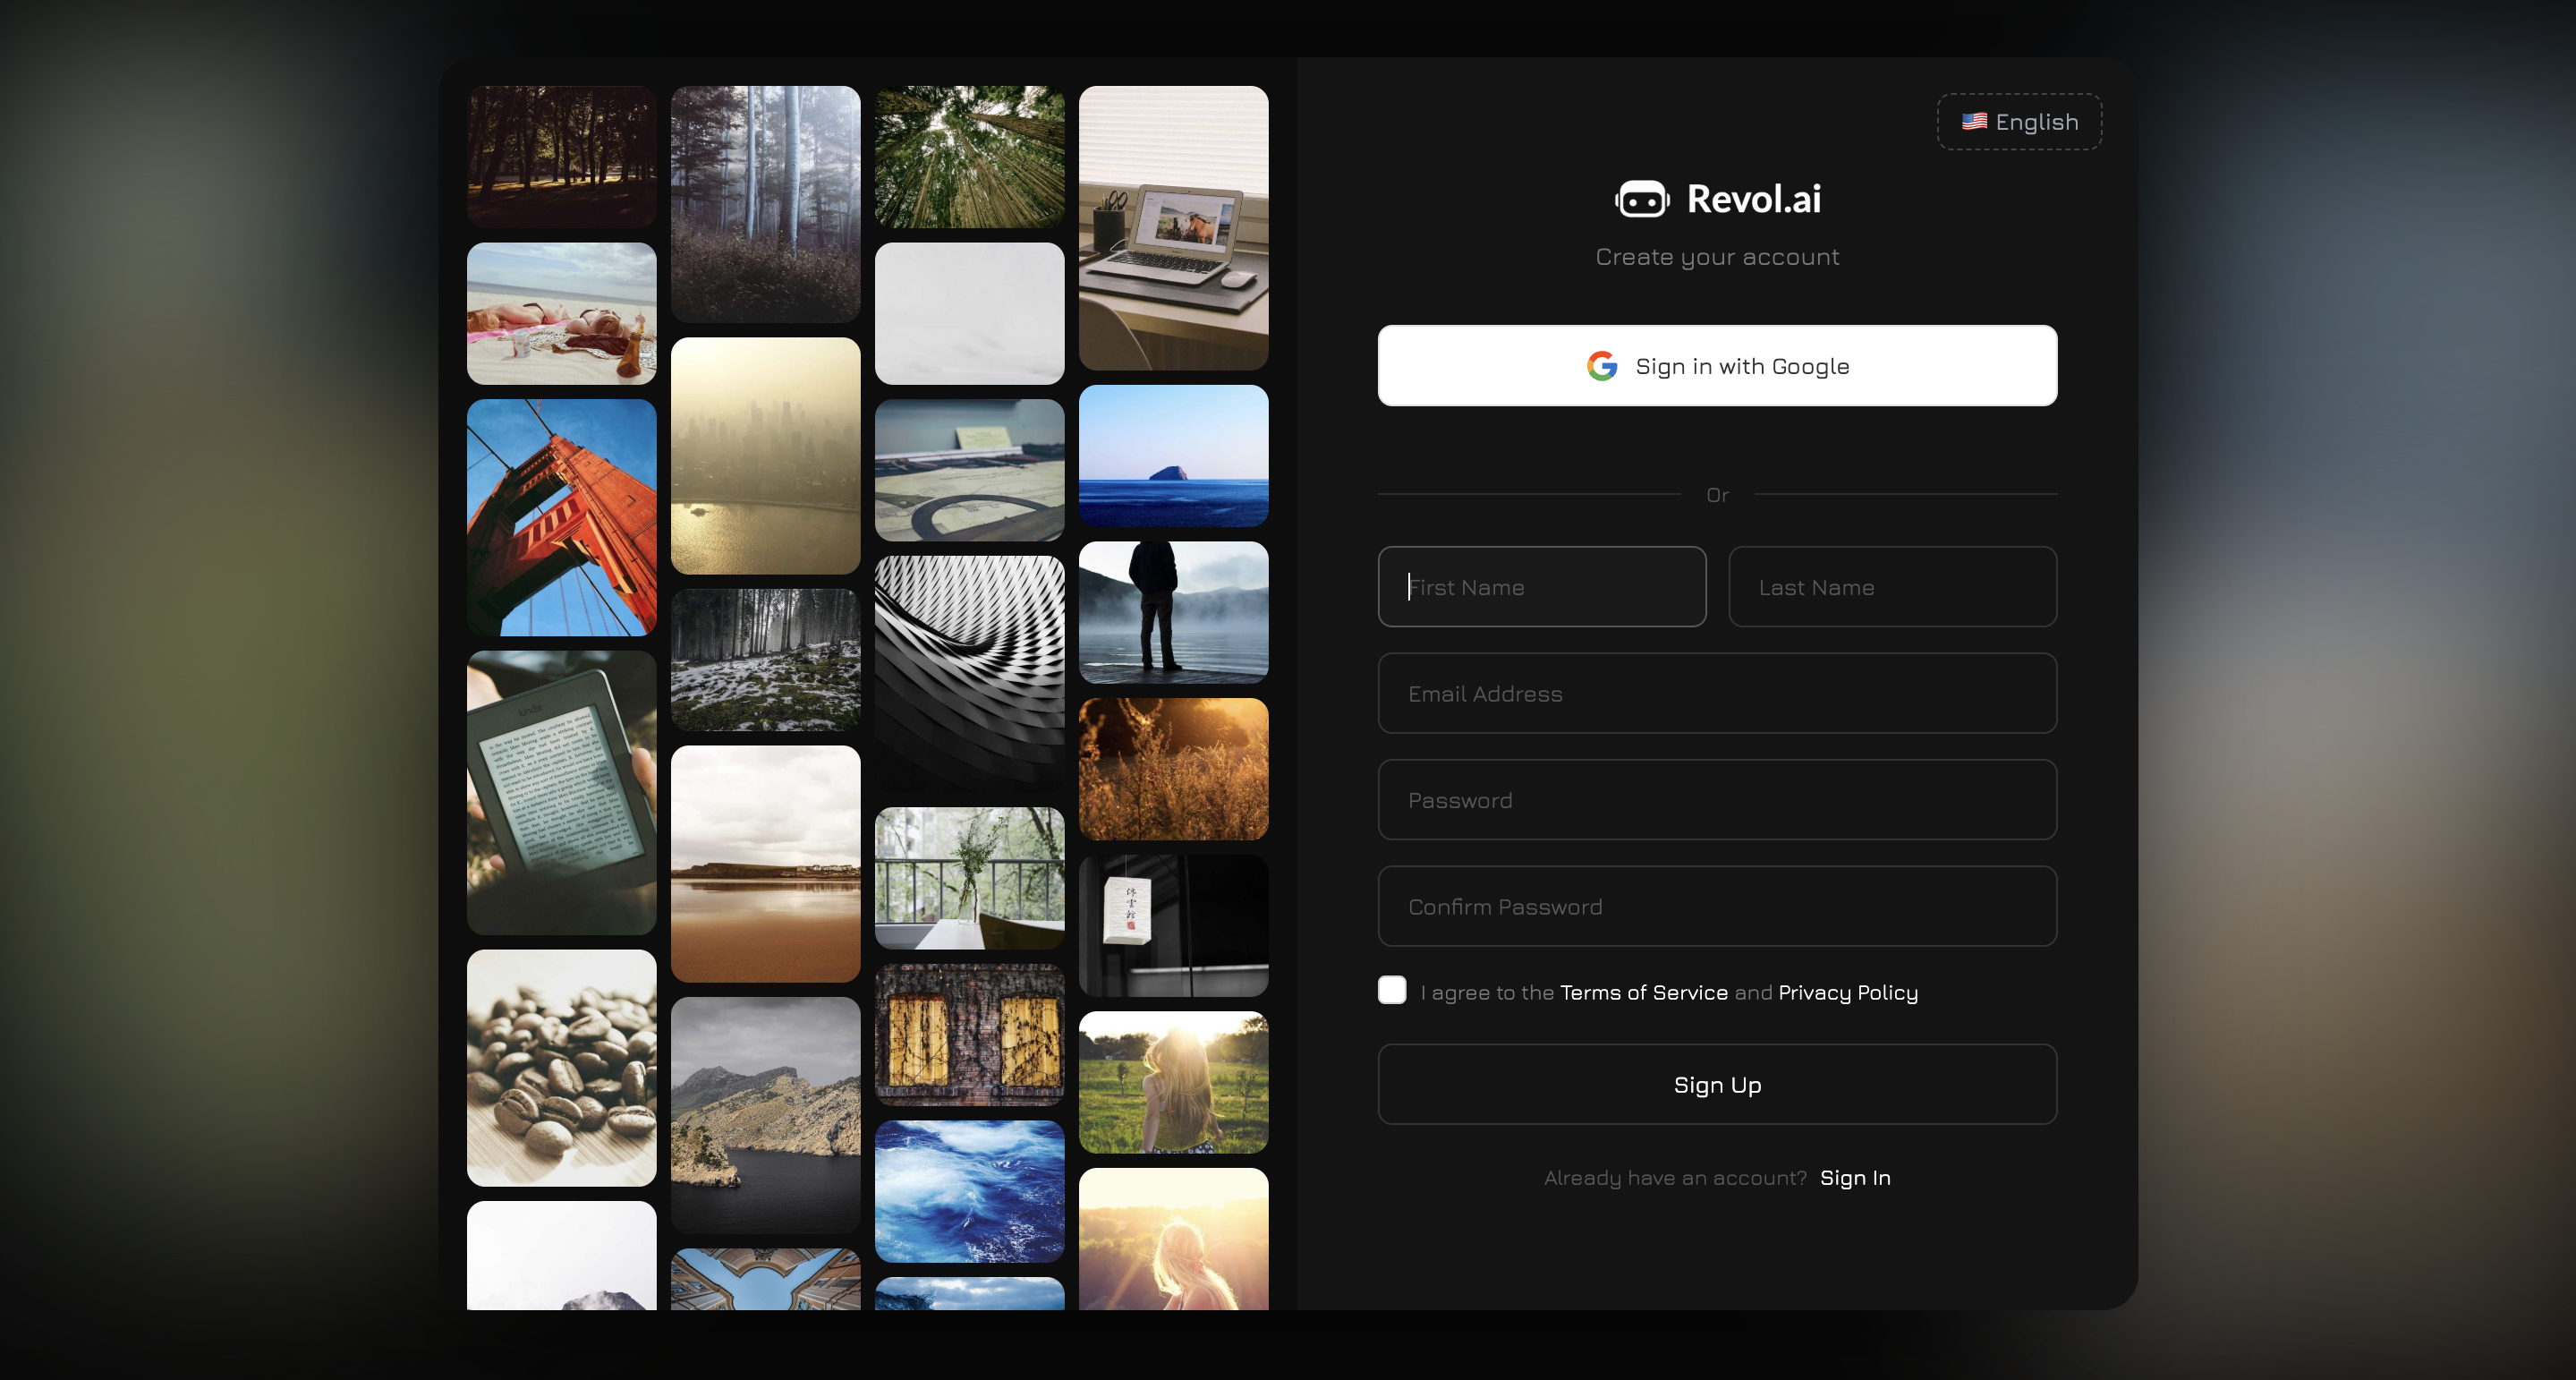
Registration and Login
Revol supports two ways to create an account:- Google OAuth — click “Continue with Google” and authorize with your Google account. The fastest way.
- Email + password — fill out the form: first name, last name, email, password, and password confirmation. You need to accept the Terms of Service and Privacy Policy.
If you already have an account, use the login page — the same Google OAuth or email/password options. There is a “Remember me” feature and password recovery via email.

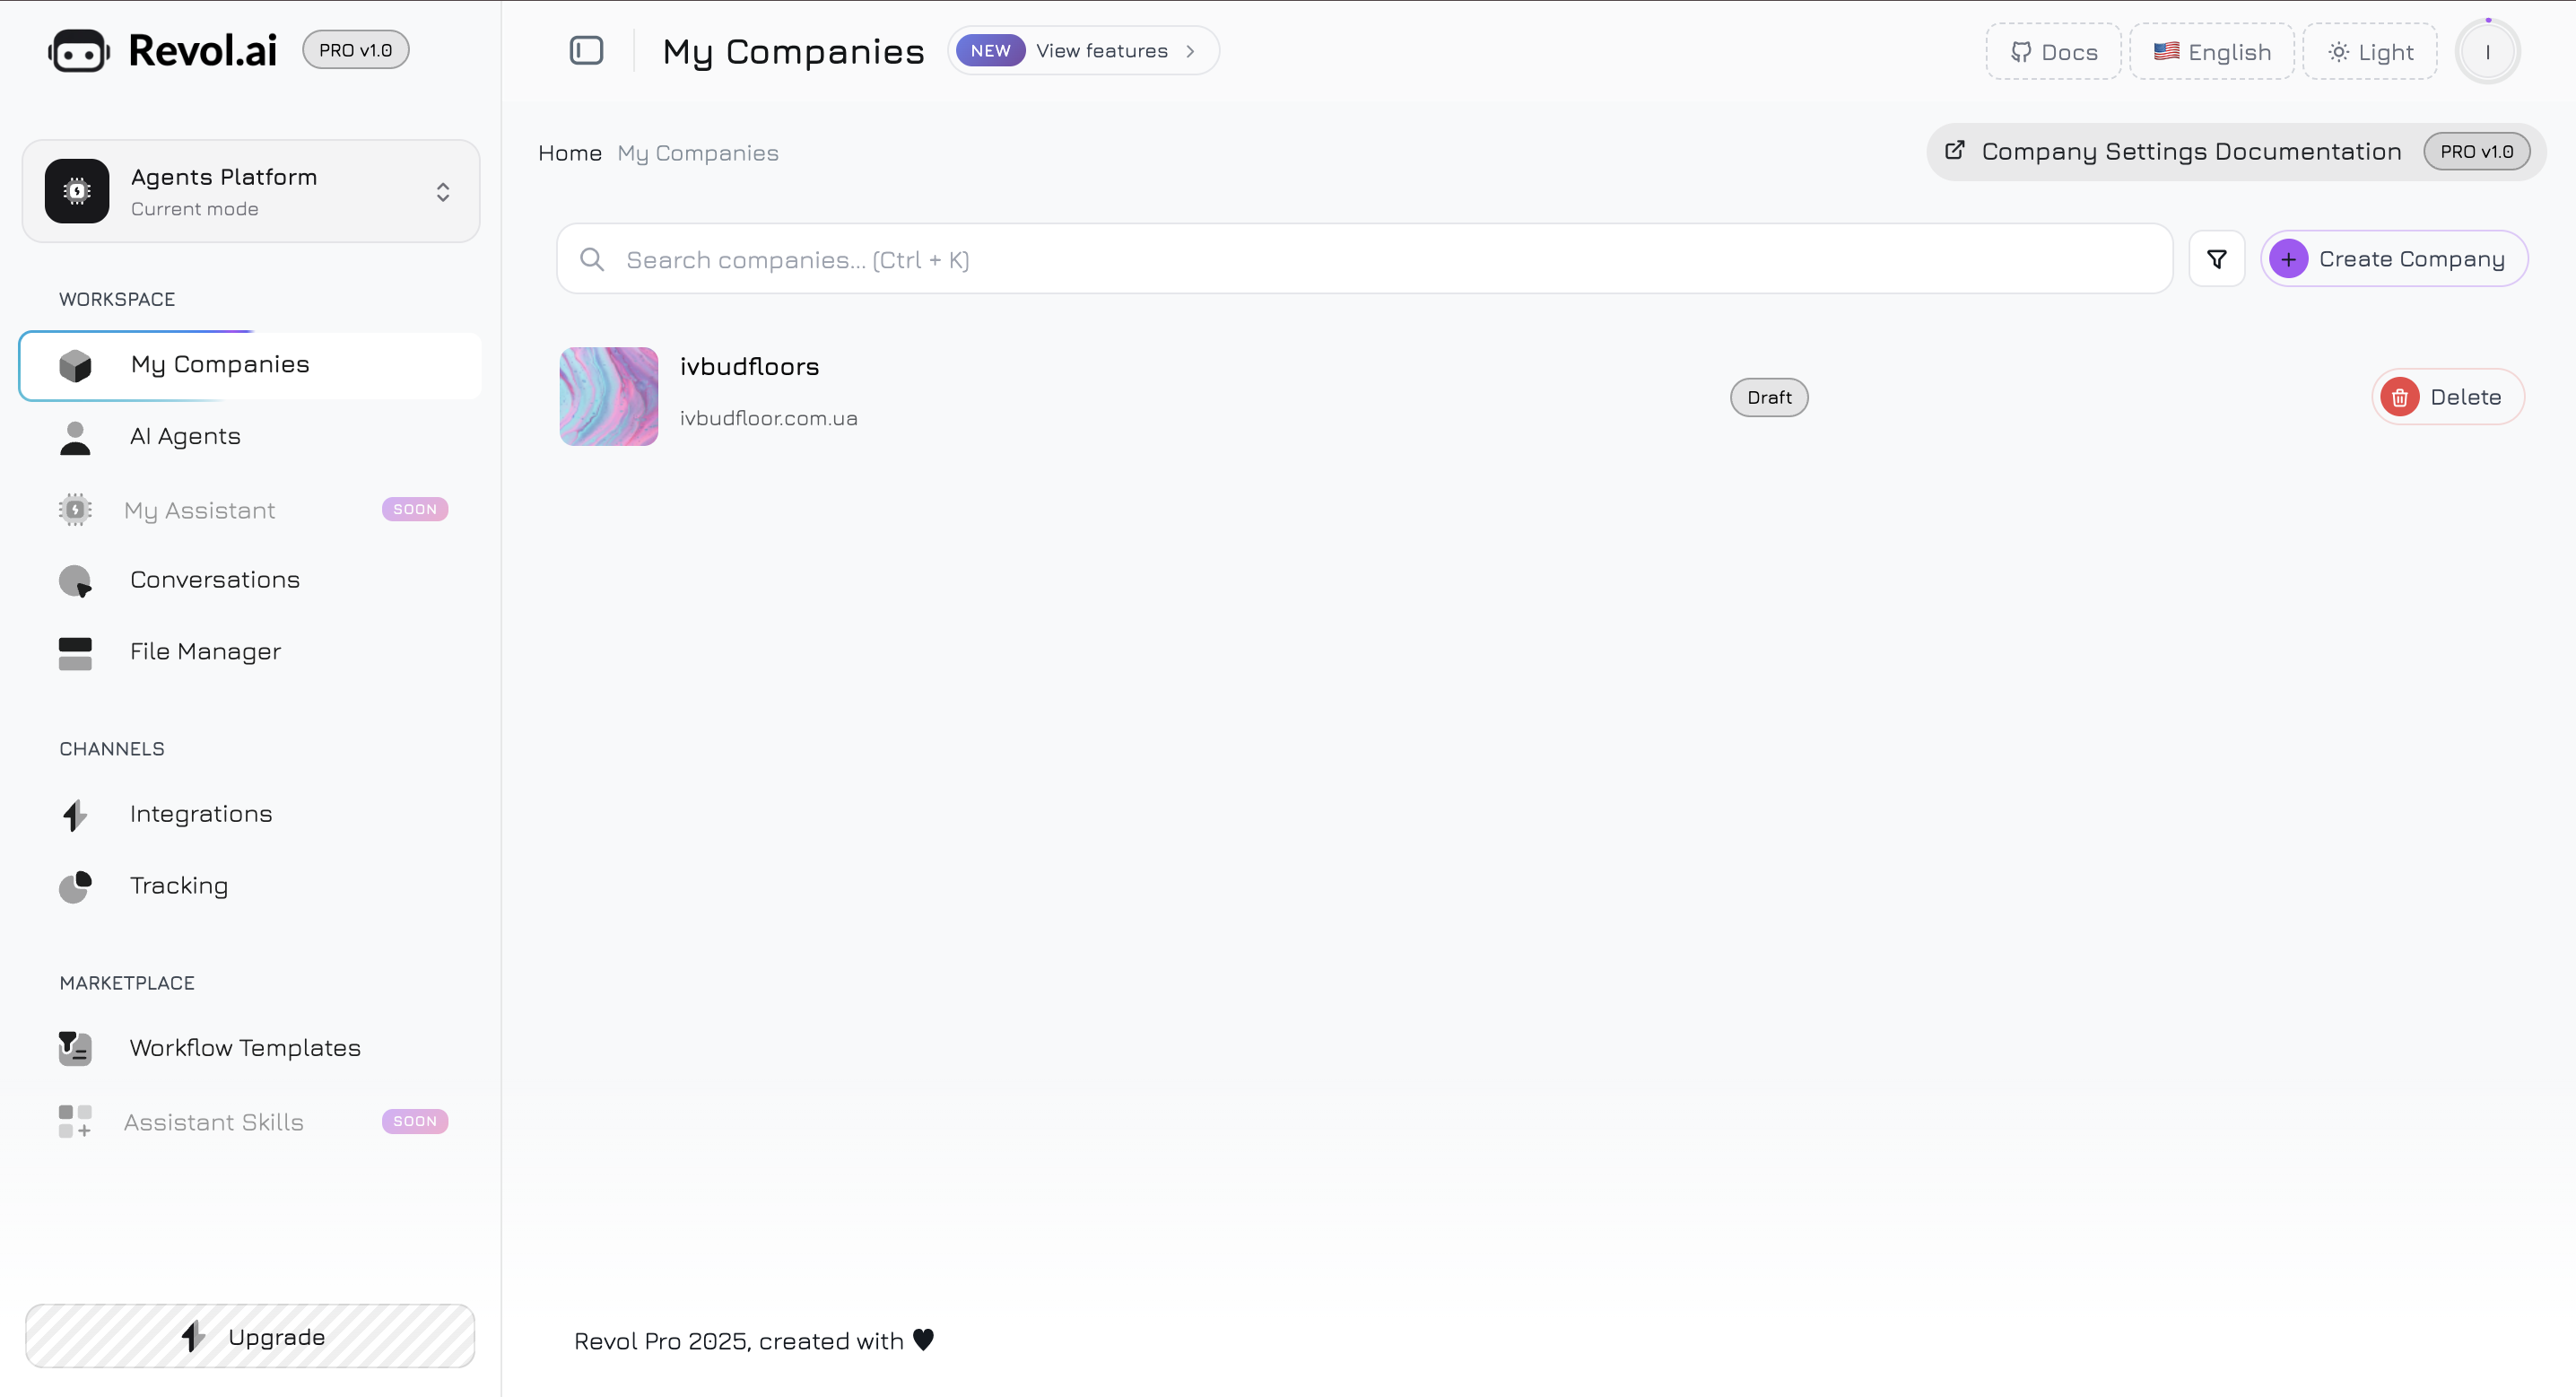
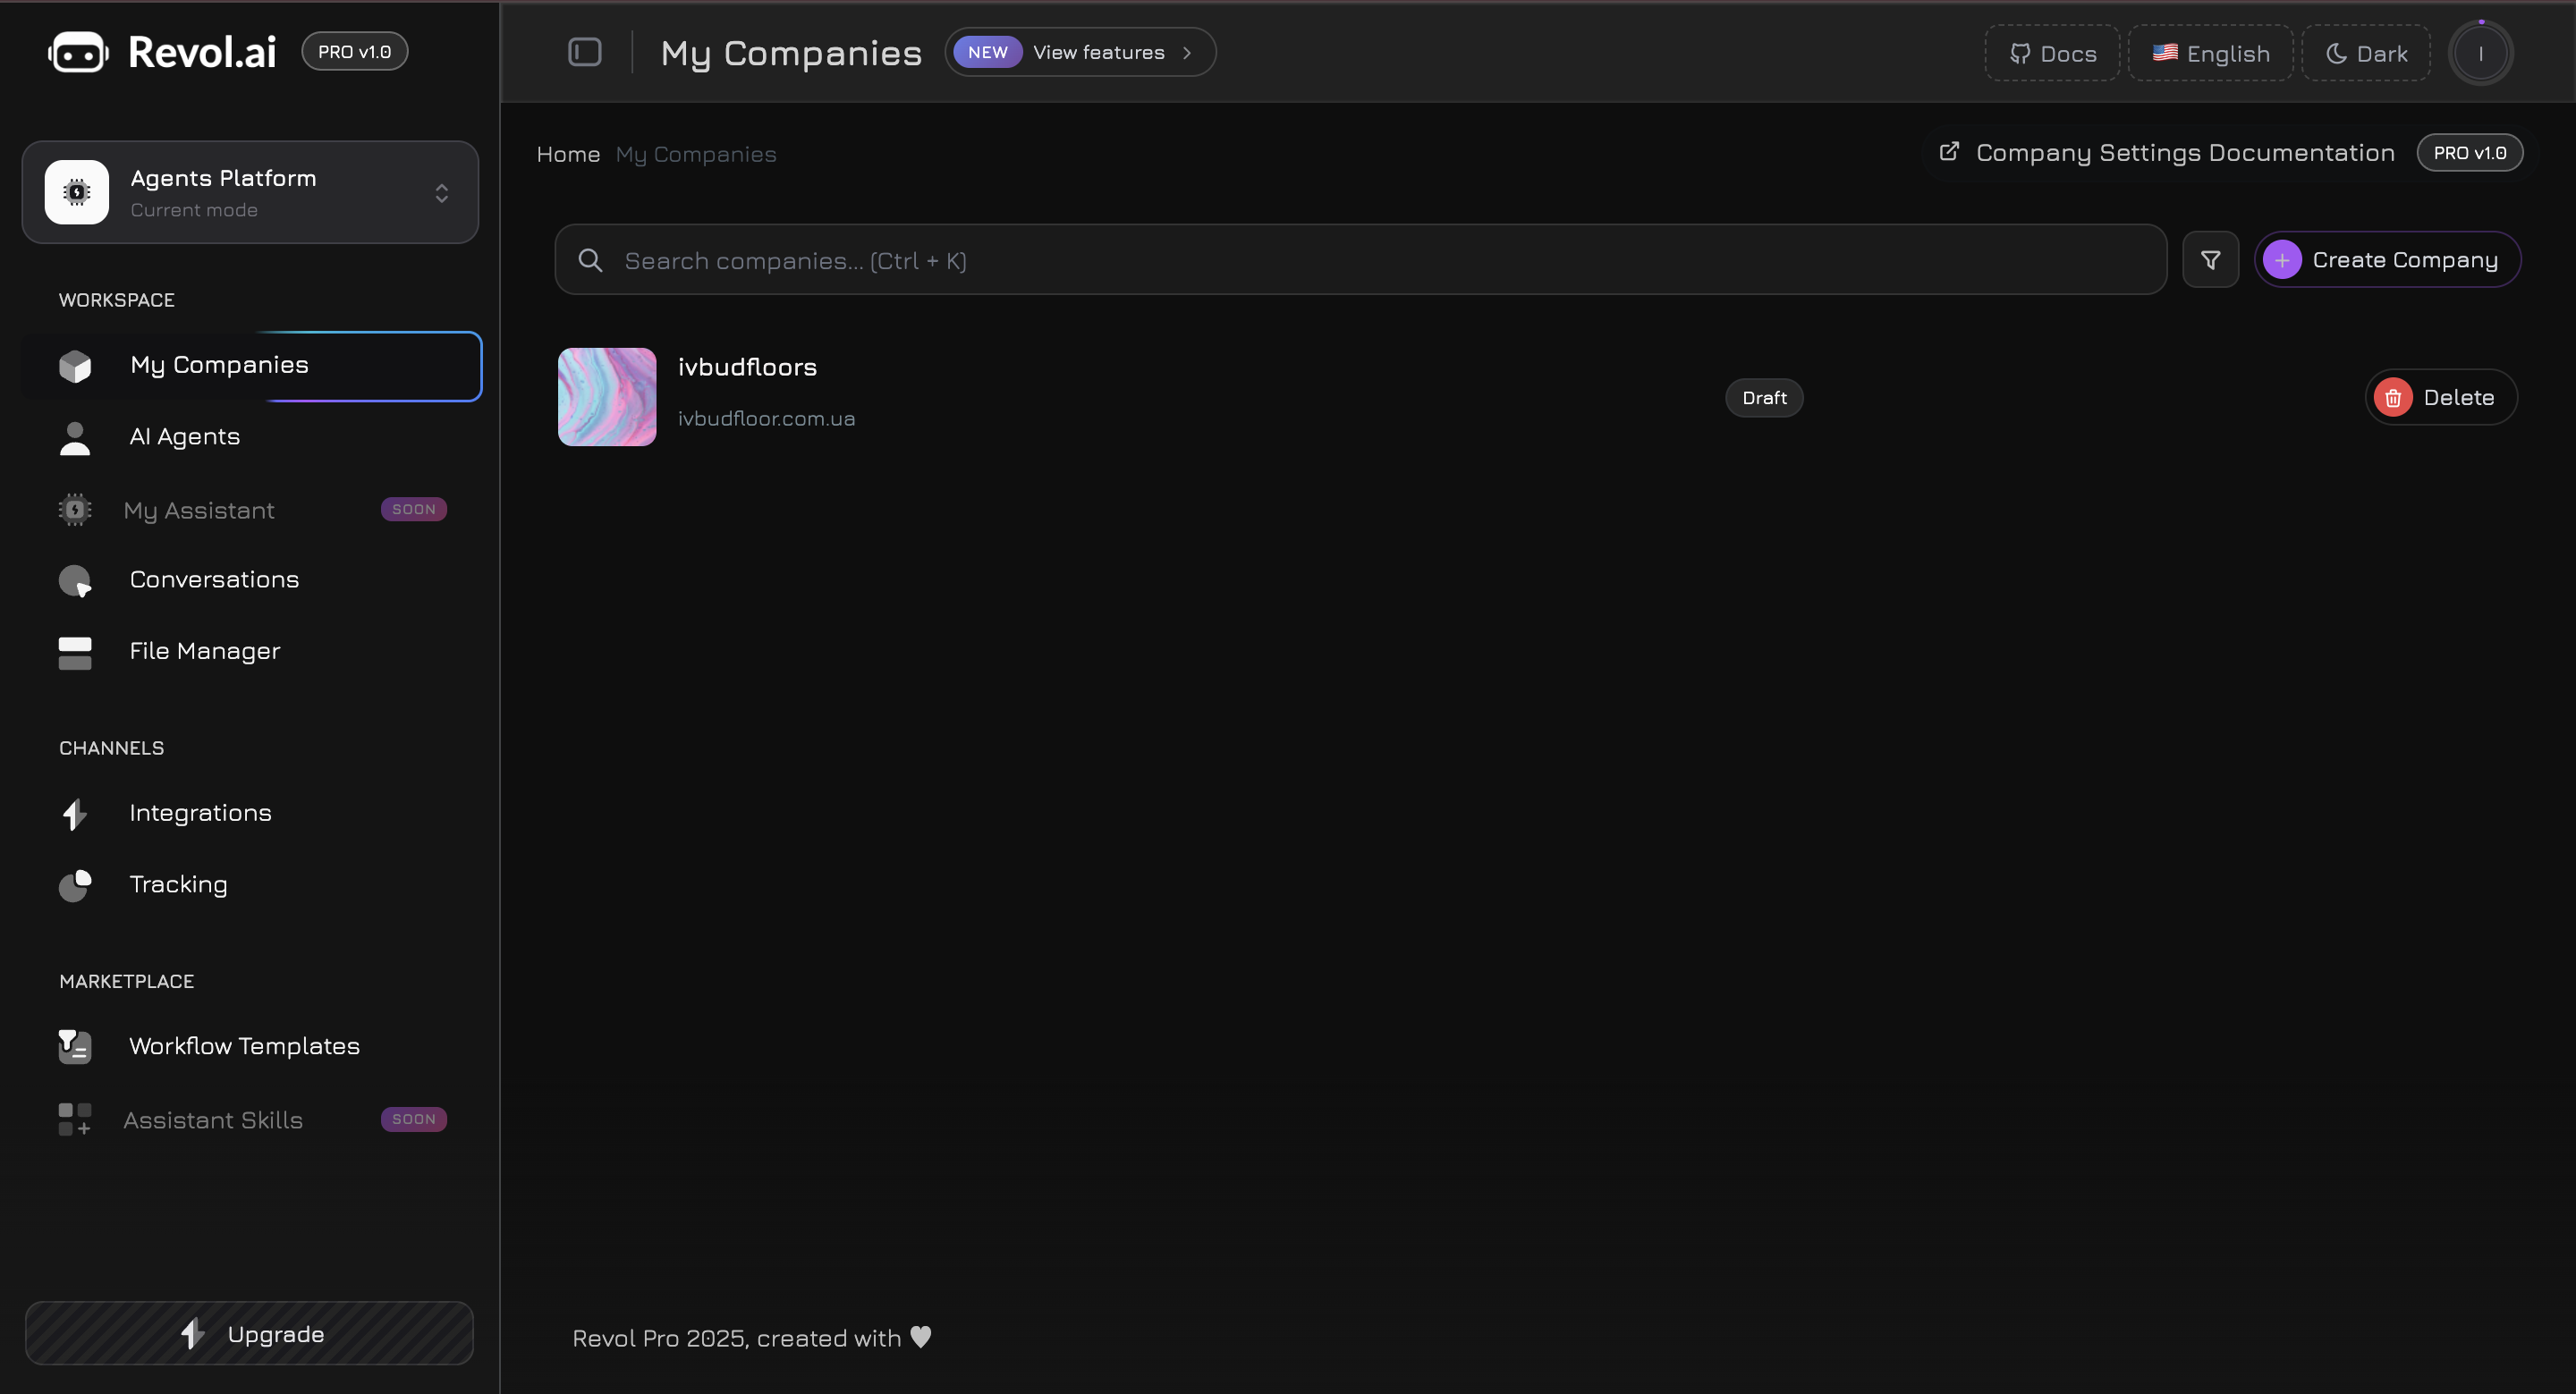
Creating a Company
After logging in, the first thing you need to do is create a company. A company is the central entity in Revol, to which all other elements are linked: products, files, agents, integrations, analytics. To create a company, fill in:| Field | Description |
|---|---|
| Company Name | Brand or business name |
| Website | Your website URL (used for widget domain validation) |
| Phone | Company contact number |
| Logo | Image that will be displayed in the widget and dashboard |
| Promo Description | Short description of your business |
Why a company and not just an agent?
Most AI chatbot platforms work with a simple approach: you create an agent, upload PDF files, and it answers questions based on those documents. This works for simple FAQ bots but quickly becomes a limitation for real businesses. Revol is built differently. We use a structured data model: company → products/services → product parameters. Here’s why:Structured data = more accurate answers
Structured data = more accurate answers
When an AI agent knows that “iPhone 15 Pro” is a specific product priced at $999, with 8 colors, and a status of “in stock,” it responds with facts rather than interpreting text from a PDF. No hallucinations about prices that have changed or products that are out of stock.
Parameters are the language of your business
Parameters are the language of your business
Every business has its own key characteristics. For an online store — size, color, material. For a clinic — procedure duration, contraindications. For SaaS — plan limits, supported integrations. Product parameters allow you to describe these details in a structured way, and the agent uses them for precise, contextual answers.
One dataset — multiple agents
One dataset — multiple agents
You fill in the product catalog once, then create multiple agents with different roles: one for sales, another for support, a third for internal training. Each agent chooses which specific products and files it uses. No data duplication.
Scaling for agencies
Scaling for agencies
If you manage multiple businesses or work as an agency — each company has isolated data, separate agents, and its own analytics. A single Revol account can serve dozens of companies.
Products and Services
After creating a company, add products or services — these are the core units that your AI agent will know about and tell customers about. To create a product, specify:| Field | Description |
|---|---|
| Name | Service or product name |
| Link | Product page URL on your website (optional) |
| Availability | Whether the product is available for order |
- Add a detailed description (prompt) — extended text about the product that the agent will use for responses
- Set the price
- Upload product photos
- Add files to the product’s knowledge base (documents, links, text, videos)

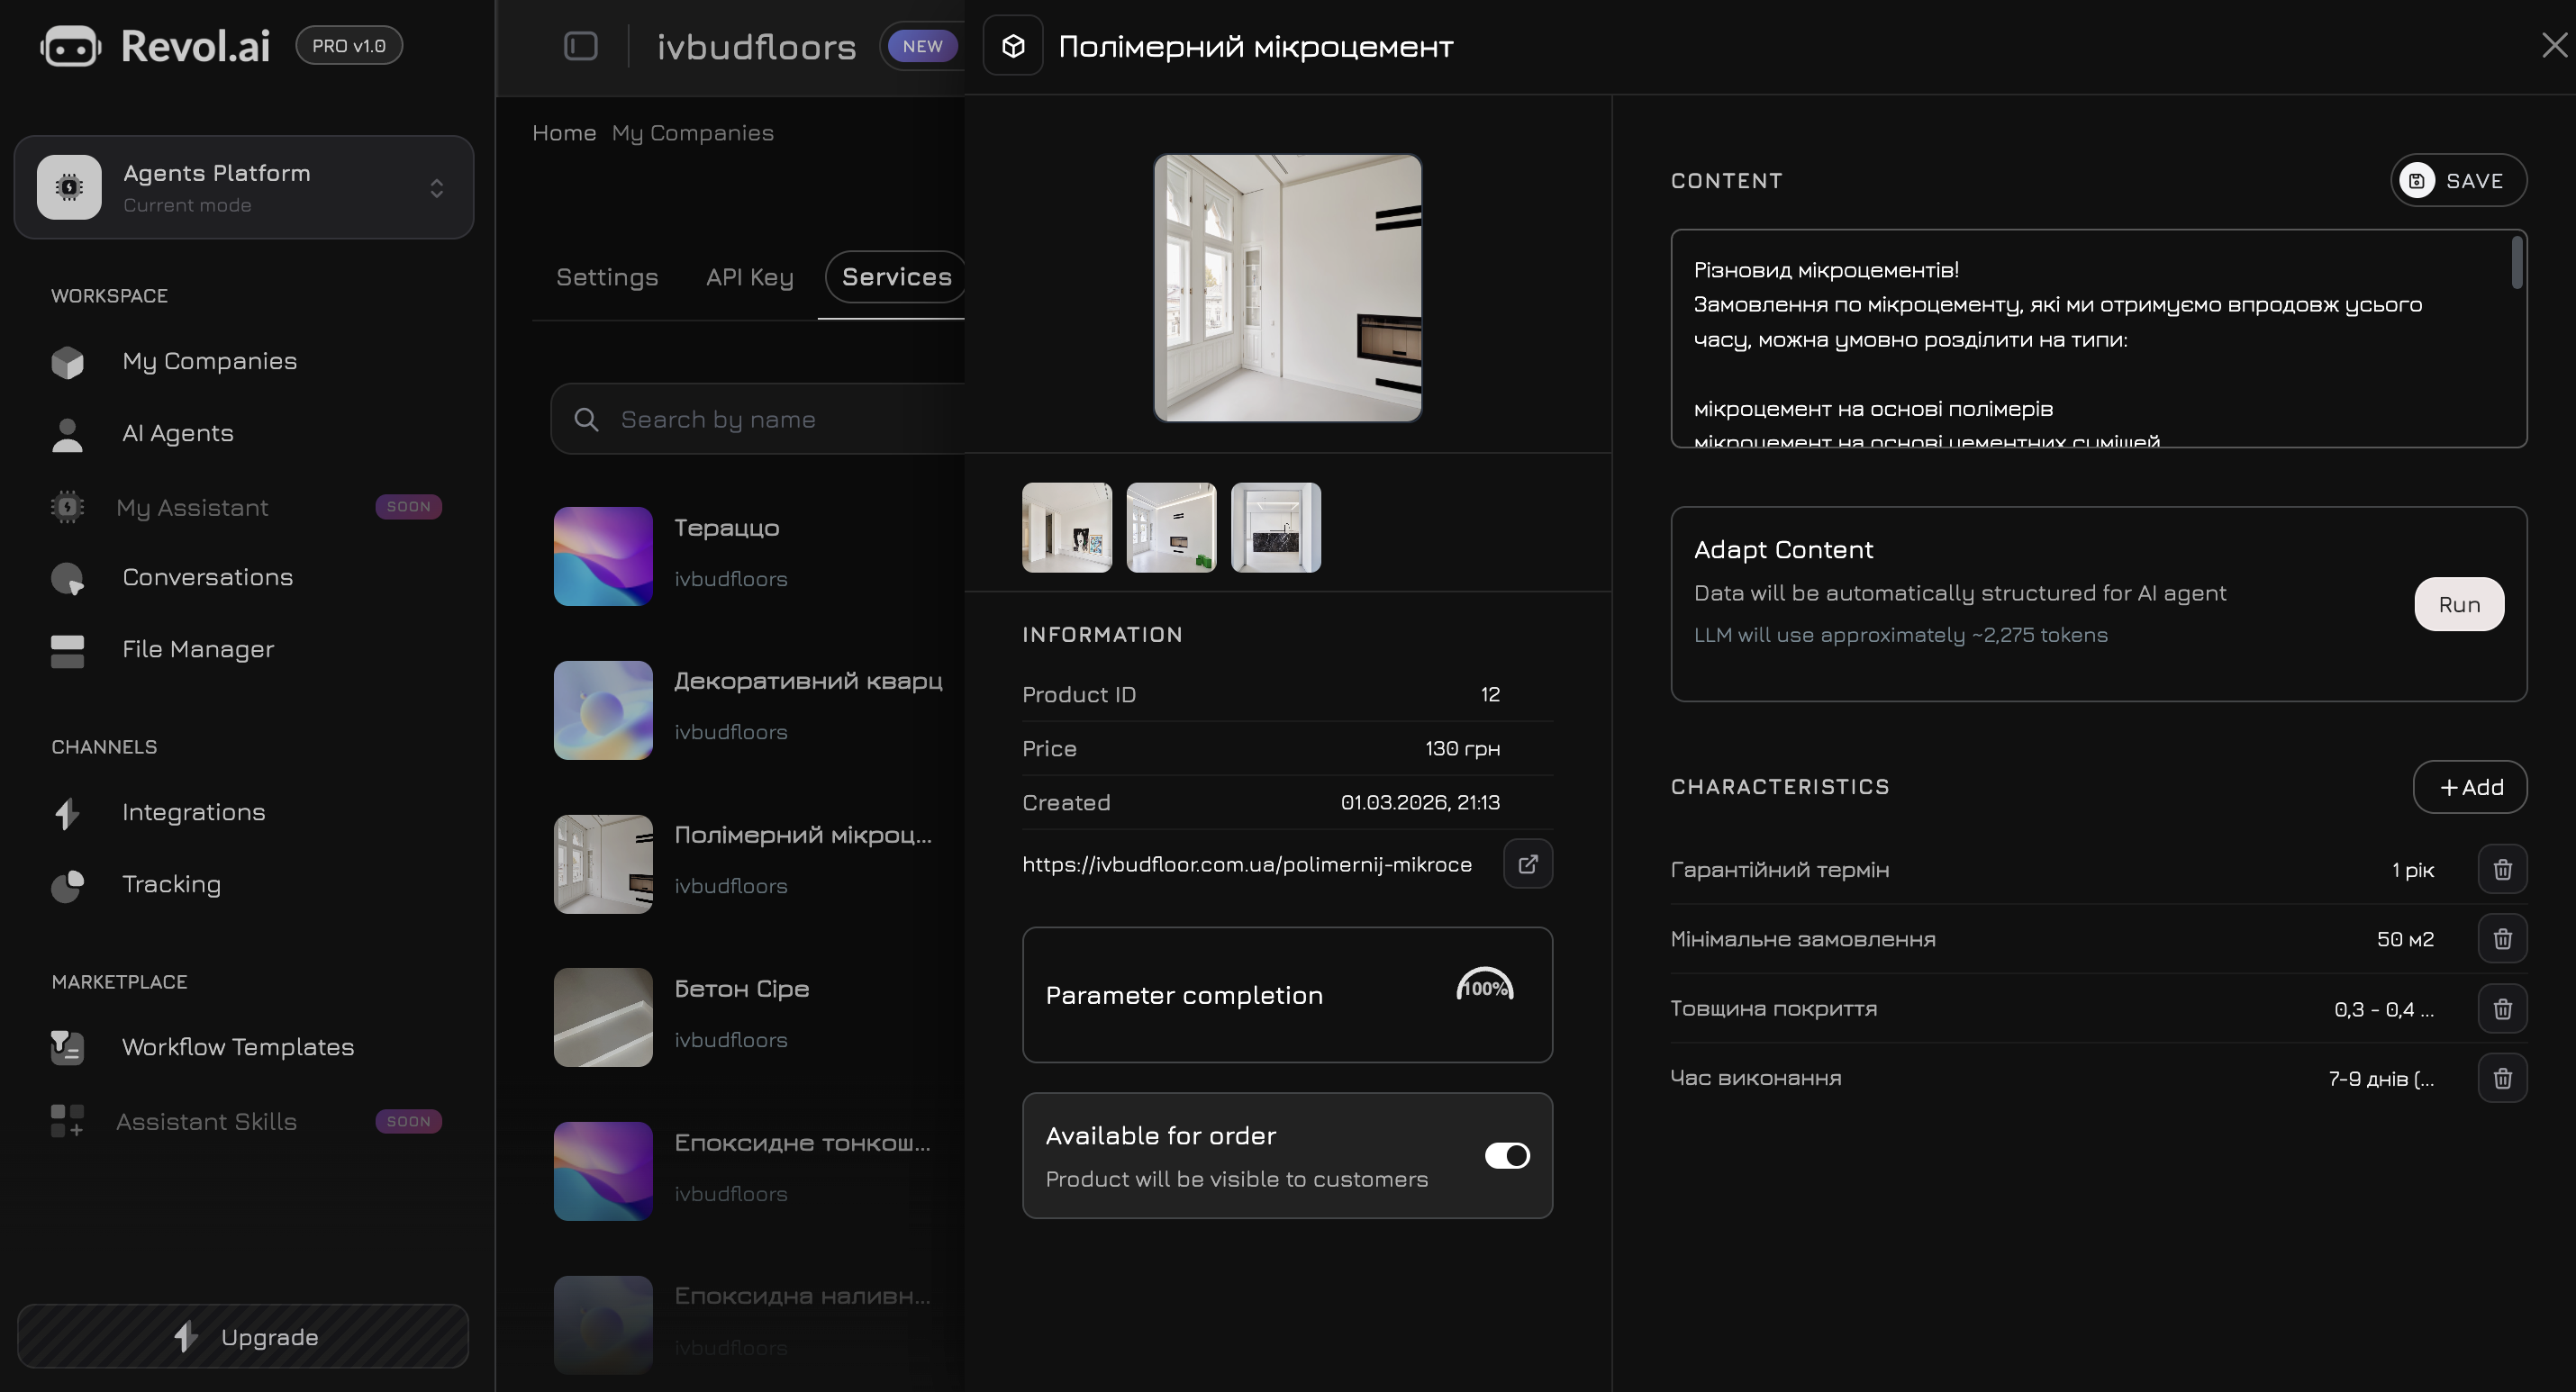
Product Parameters
The most powerful part of the product model is parameters. These are structured “name — value” pairs that describe specific product characteristics. Parameter examples for different businesses:- Online Store
- Clinic / Salon
- SaaS / IT
| Parameter | Value |
|---|---|
| Size | S, M, L, XL |
| Color | Black, White, Blue |
| Material | 100% cotton |
| Weight | 250 g |
| Warranty | 12 months |
- Accuracy — specific values instead of vague wording
- Up-to-date info — change a parameter in one place, and the agent immediately responds with the updated information
- Comparison — the agent can compare products by specific parameters
File Manager
File Manager is the centralized storage for all your company’s files. This is where you upload content that will be used to train AI agents. Go to File Manager in the side menu. You will see a list of companies — select the one you need to open its files.Content Types
- Documents
- Links
- Text
- Video
- Photos
Upload files in PDF, DOCX, TXT formats. Revol will automatically extract the text, split it into chunks, and create vector embeddings for semantic search.
| Format | Max Size | What is Extracted |
|---|---|---|
| 10 MB | Text from all pages | |
| DOCX | 10 MB | Text with formatting |
| TXT | 5 MB | Full text |

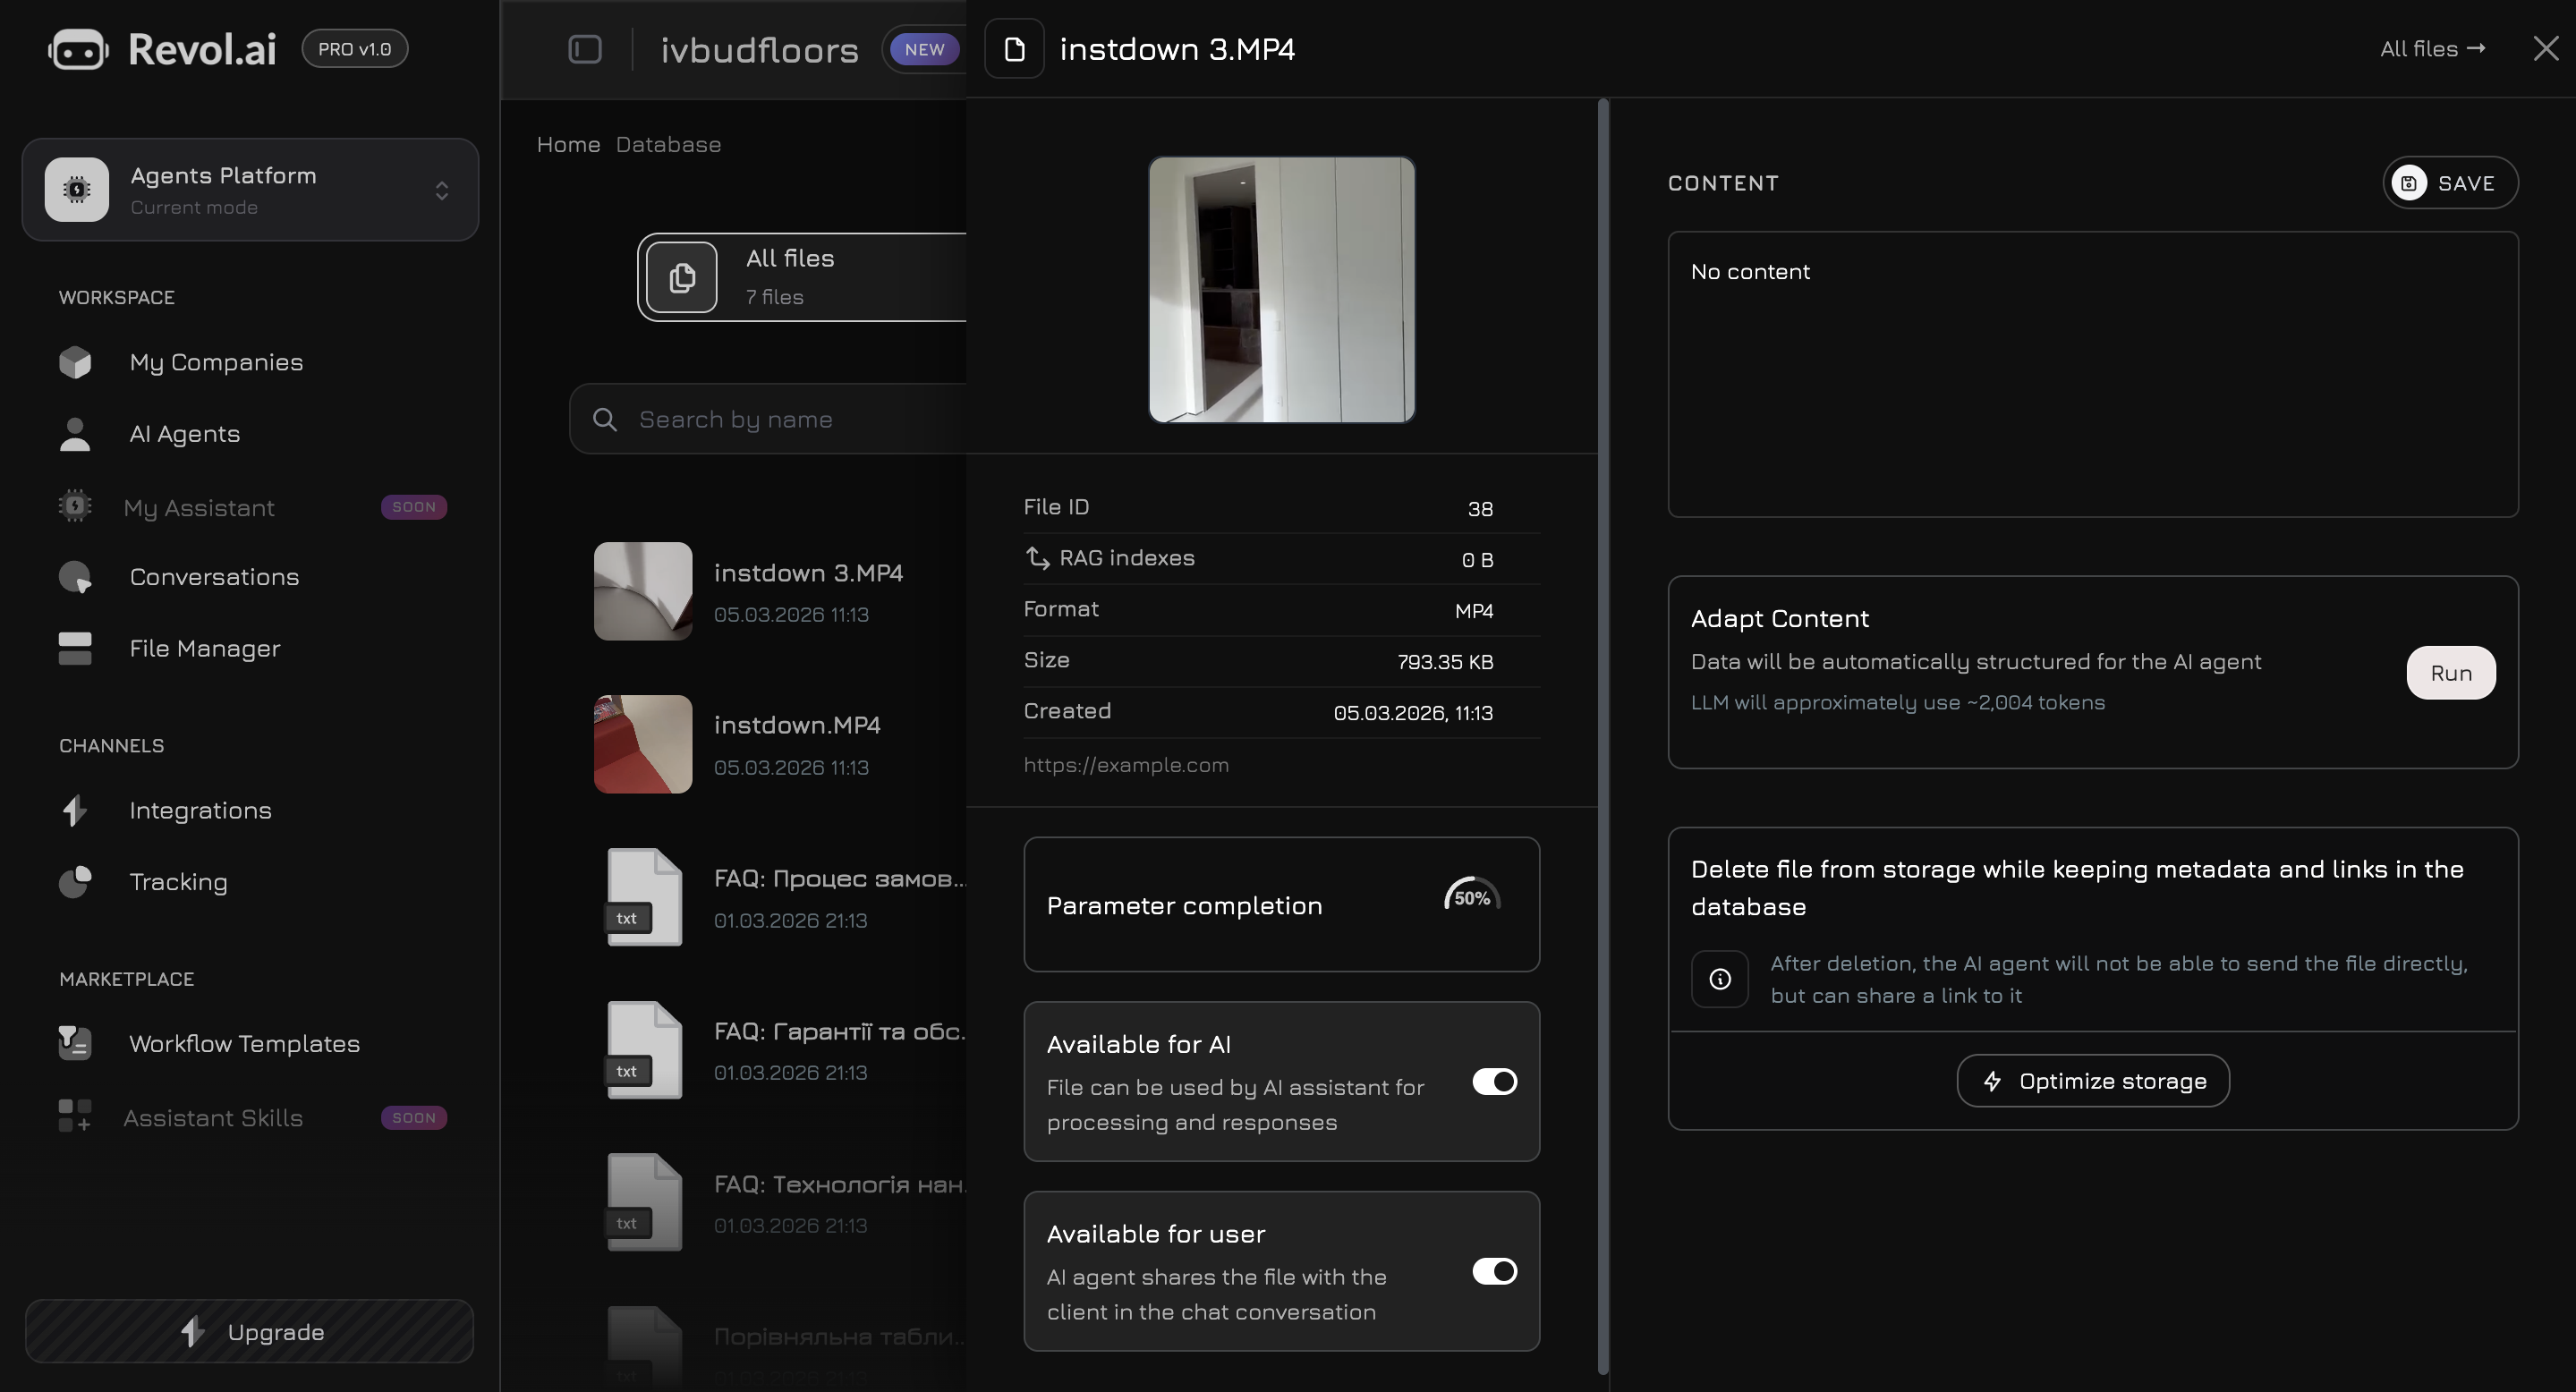
Files can be added both at the company level (available to all agents) and at the individual product level (linked to a specific product/service).
Creating an AI Agent
Now that you have a company with products and files — it’s time to create an AI agent. Go to AI Agents in the side menu and click Create Agent.Basic Settings
| Field | Description |
|---|---|
| Name | Agent name (e.g., “Sales Consultant”) |
| Company | Which company the agent belongs to |
| Use Case | Agent role: Sales, Support, Lead Generation, Scheduling, Custom |
| LLM Provider | AI model provider |
| Model | Specific model to use |
Available LLM Providers
OpenAI
GPT-4o, GPT-4o-mini — the most popular choice for most tasks
Anthropic
Claude Sonnet, Claude Haiku — excellent response quality and safety
Gemini 2.0 Flash, Gemini 2.5 Pro — fast and efficient models
Groq
Llama 3.1 8B, Llama 3.3 70B — fastest inference, open-source models
System Prompt
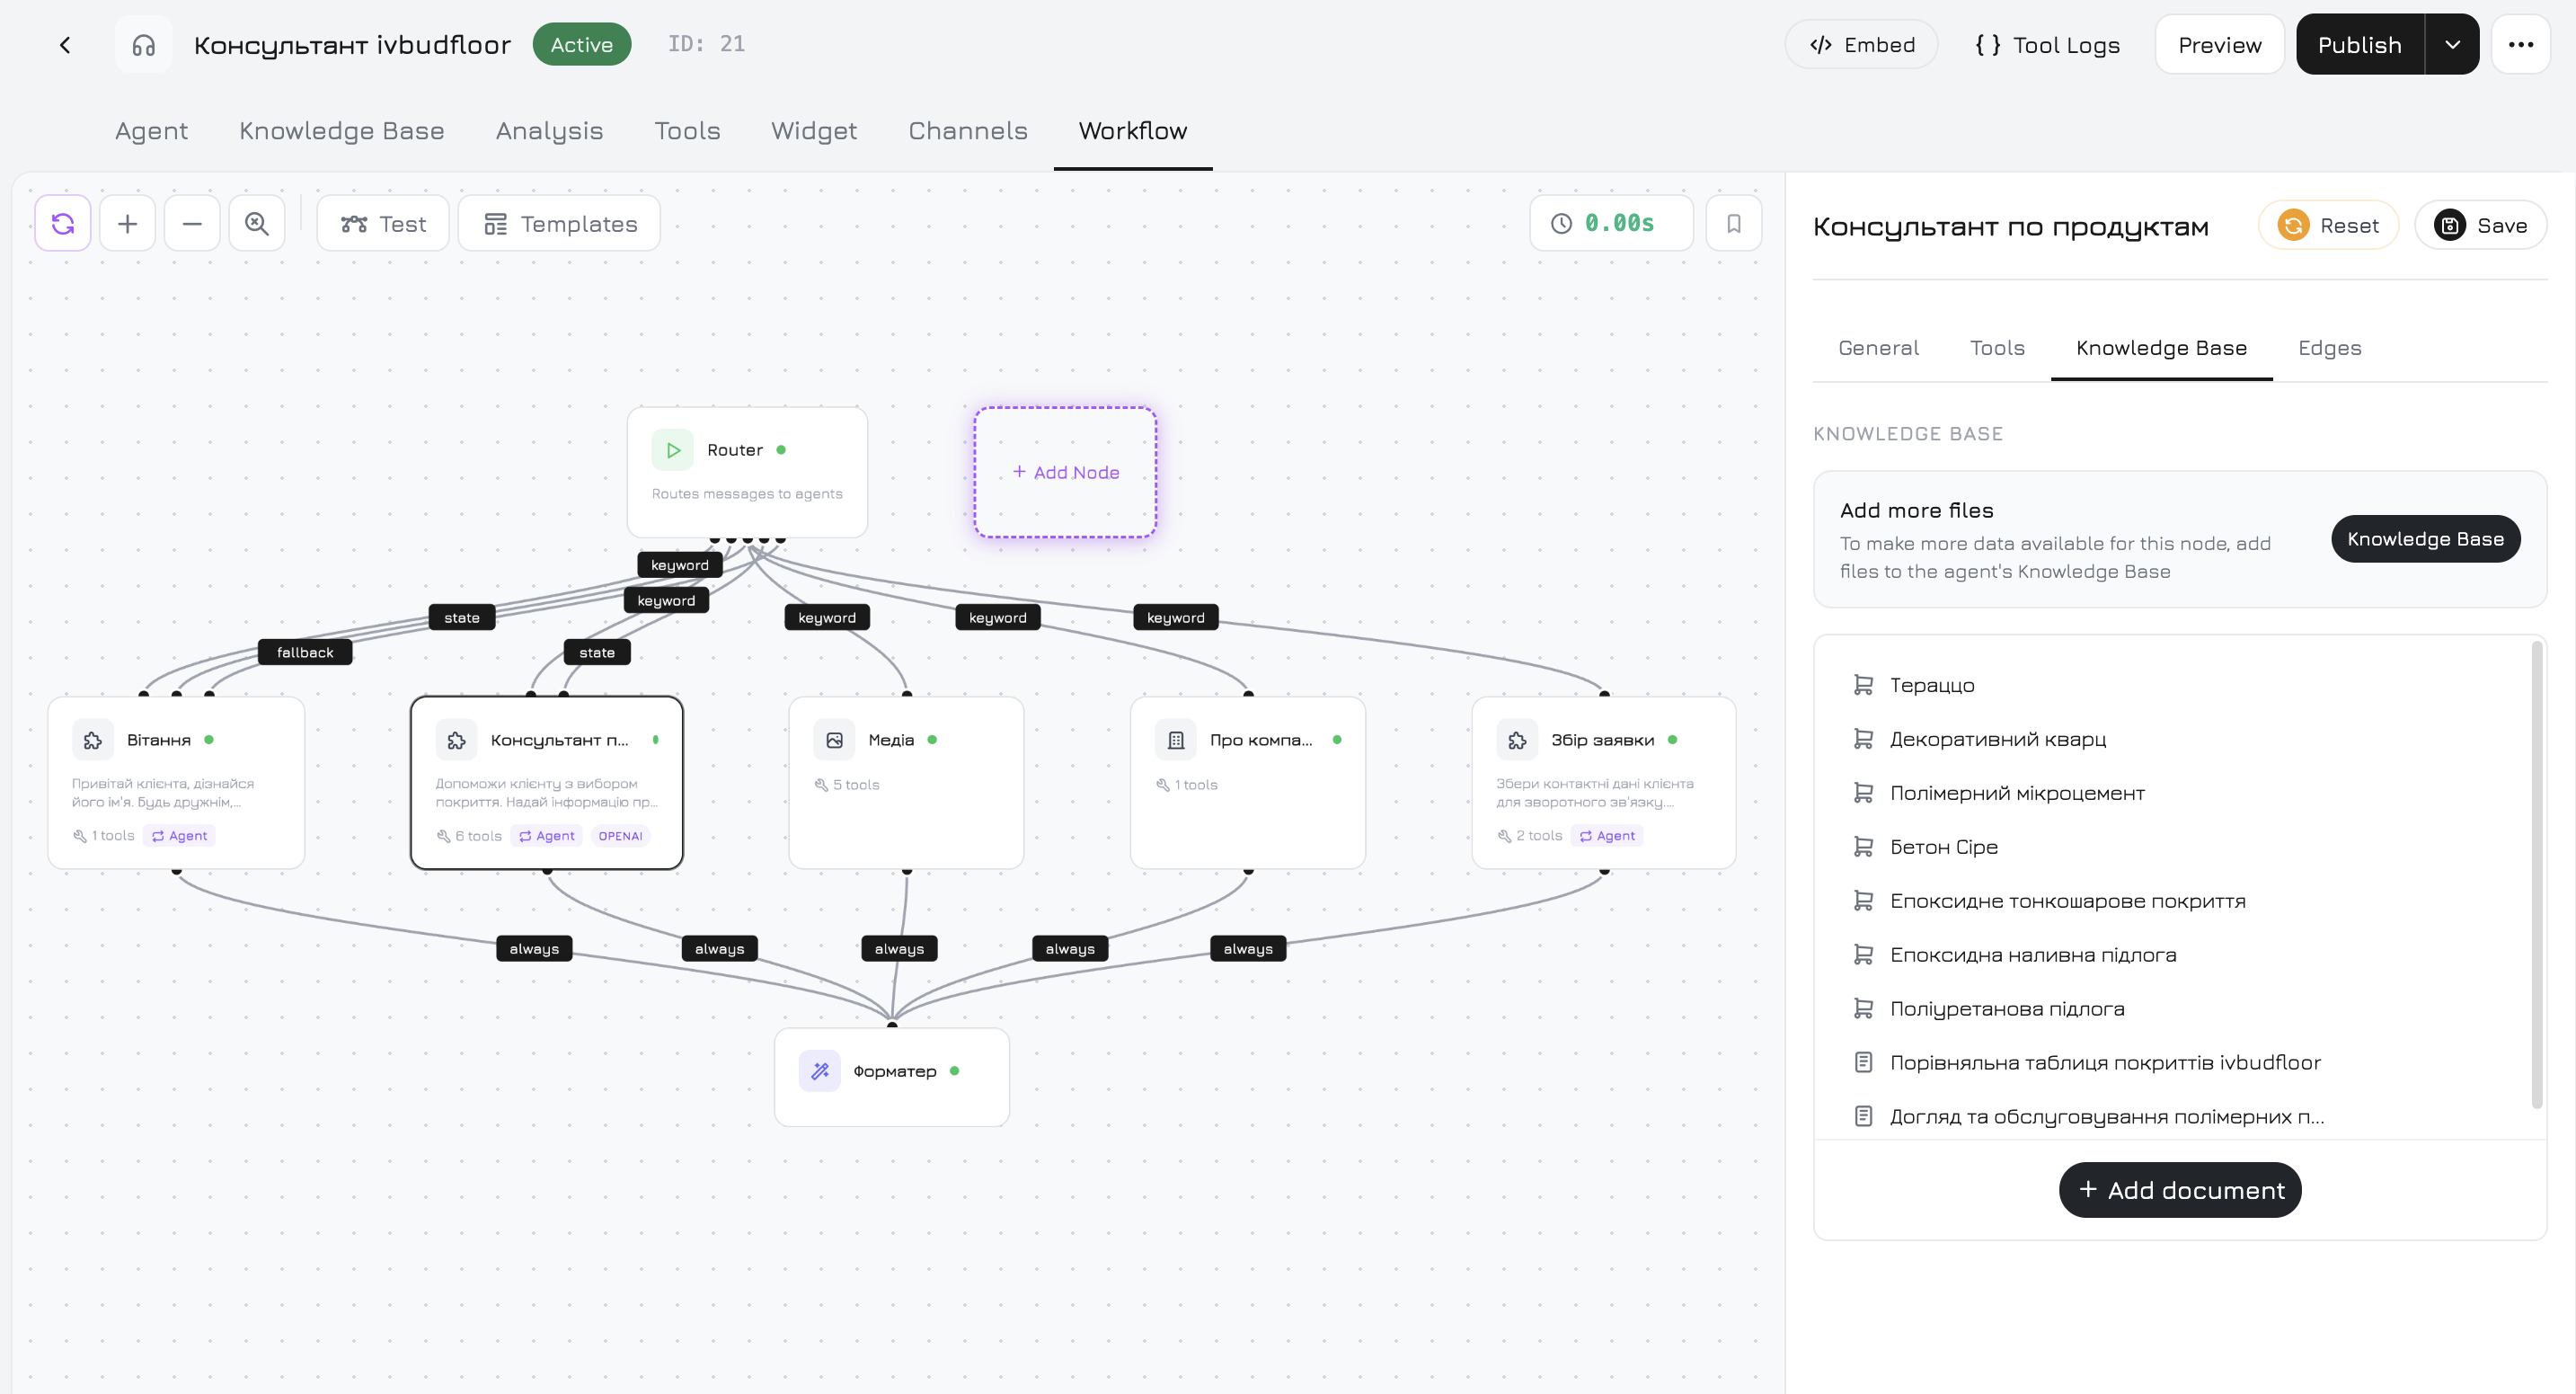
After creating the agent, a full-screen settings panel opens. The first step is to write a System Prompt — the core instruction that defines the agent’s behavior.Agent Knowledge Base
Navigate to the Knowledge tab in the agent panel. Here you choose which specific data the agent will use for responses.Knowledge Sources
The agent can learn from two types of sources:Company Products
Company Products
Select specific products or services the agent should know about. The agent will get access to names, descriptions, prices, parameters, and photos of the selected products.
Knowledge Base Files
Knowledge Base Files
Select documents, links, texts, and videos from the File Manager. You can choose files both at the company level and those linked to specific products.
Training
After selecting sources, click Train. Revol will:- Extract all text content from the selected sources
- Split it into optimal chunks
- Create vector embeddings via OpenAI text-embedding-3-small
- Store them in PostgreSQL with pgvector for semantic search
Testing the Agent
Before publishing, test the agent right in the dashboard. Click the Preview button in the agent’s top panel — a built-in chat window will open.Basic Workflow
Every new agent comes with a ready-made workflow that covers basic needs without additional configuration. Its structure:| Node | What It Does | Tools |
|---|---|---|
| Start | Entry point — receives the user’s message | — |
| Product Agent | Searches for products, details, availability, parameters | get_products, get_product_details, check_availability, search_by_parameters |
| Media Agent | Finds photos, videos, and documents from the knowledge base | get_photos, get_videos, get_documents, search_documents |
| Company Agent | Answers general questions about the company | get_company_info |
| Response Formatter | Collects responses from all agents and forms the final message | — |
| Voice Input / Output | STT and TTS for voice mode (disabled by default) | — |
What to Check
Basic Answers
Ask about your products and services. Make sure the agent responds accurately and uses data from the knowledge base.
Knowledge Boundaries
Ask something that is not in the knowledge base. The agent should honestly say it doesn’t have that information rather than making up an answer.
Tone and Style
Check whether the communication tone matches your system prompt — politeness, language, formality.
Installing the Widget
When the agent is ready — install the widget on your website. Click the Embed button in the agent’s top panel.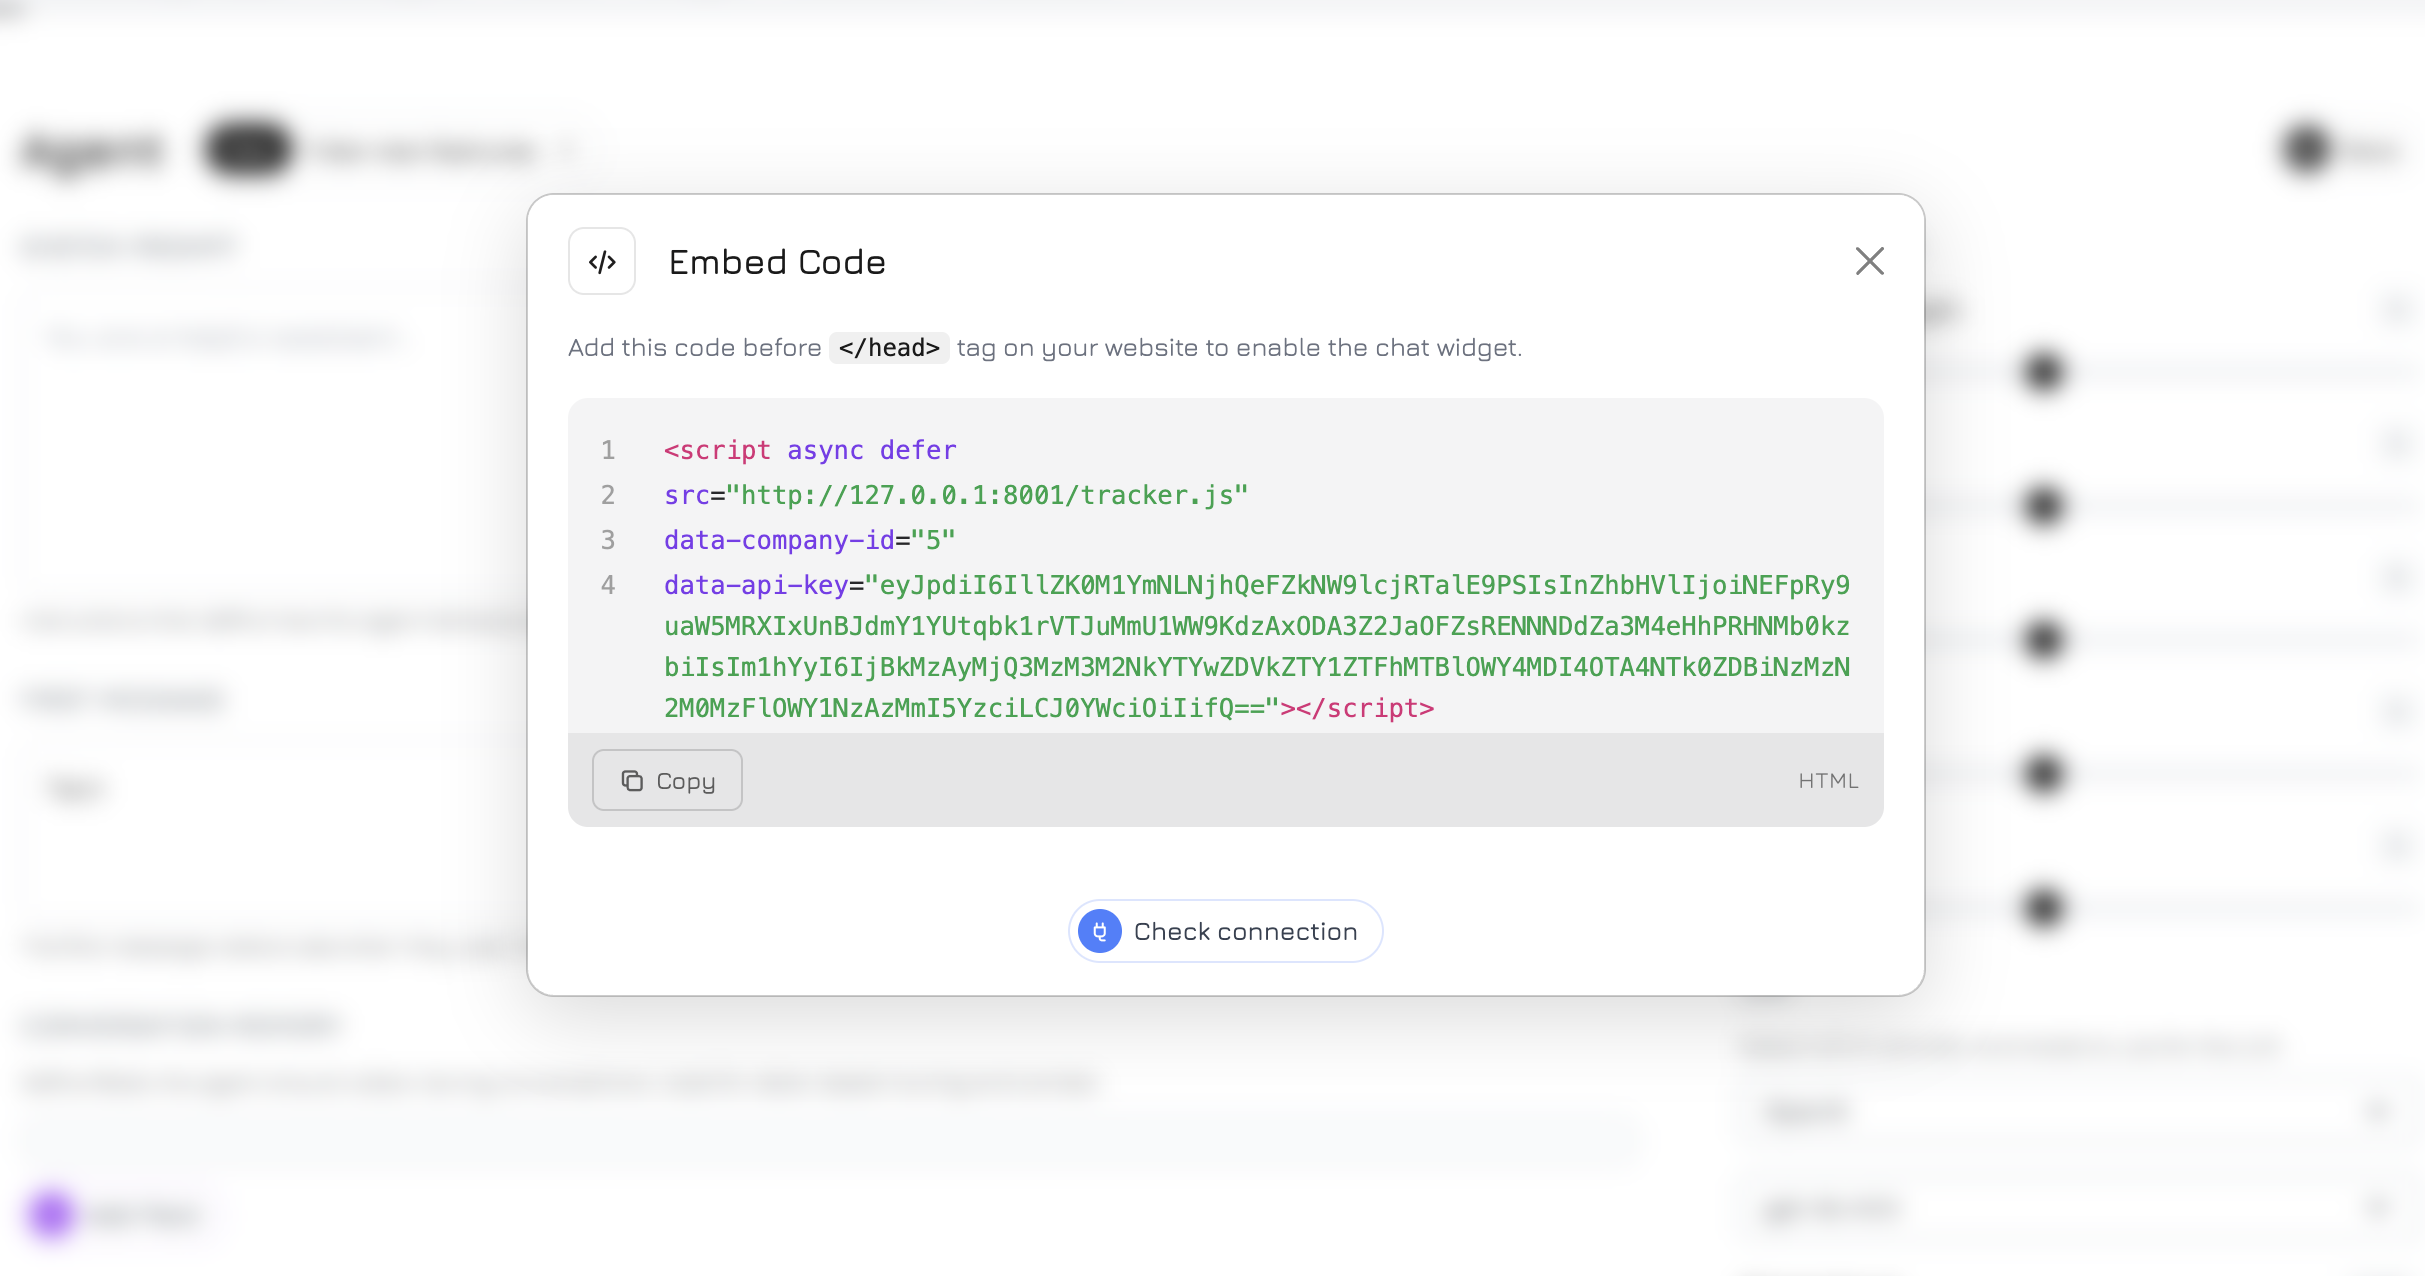
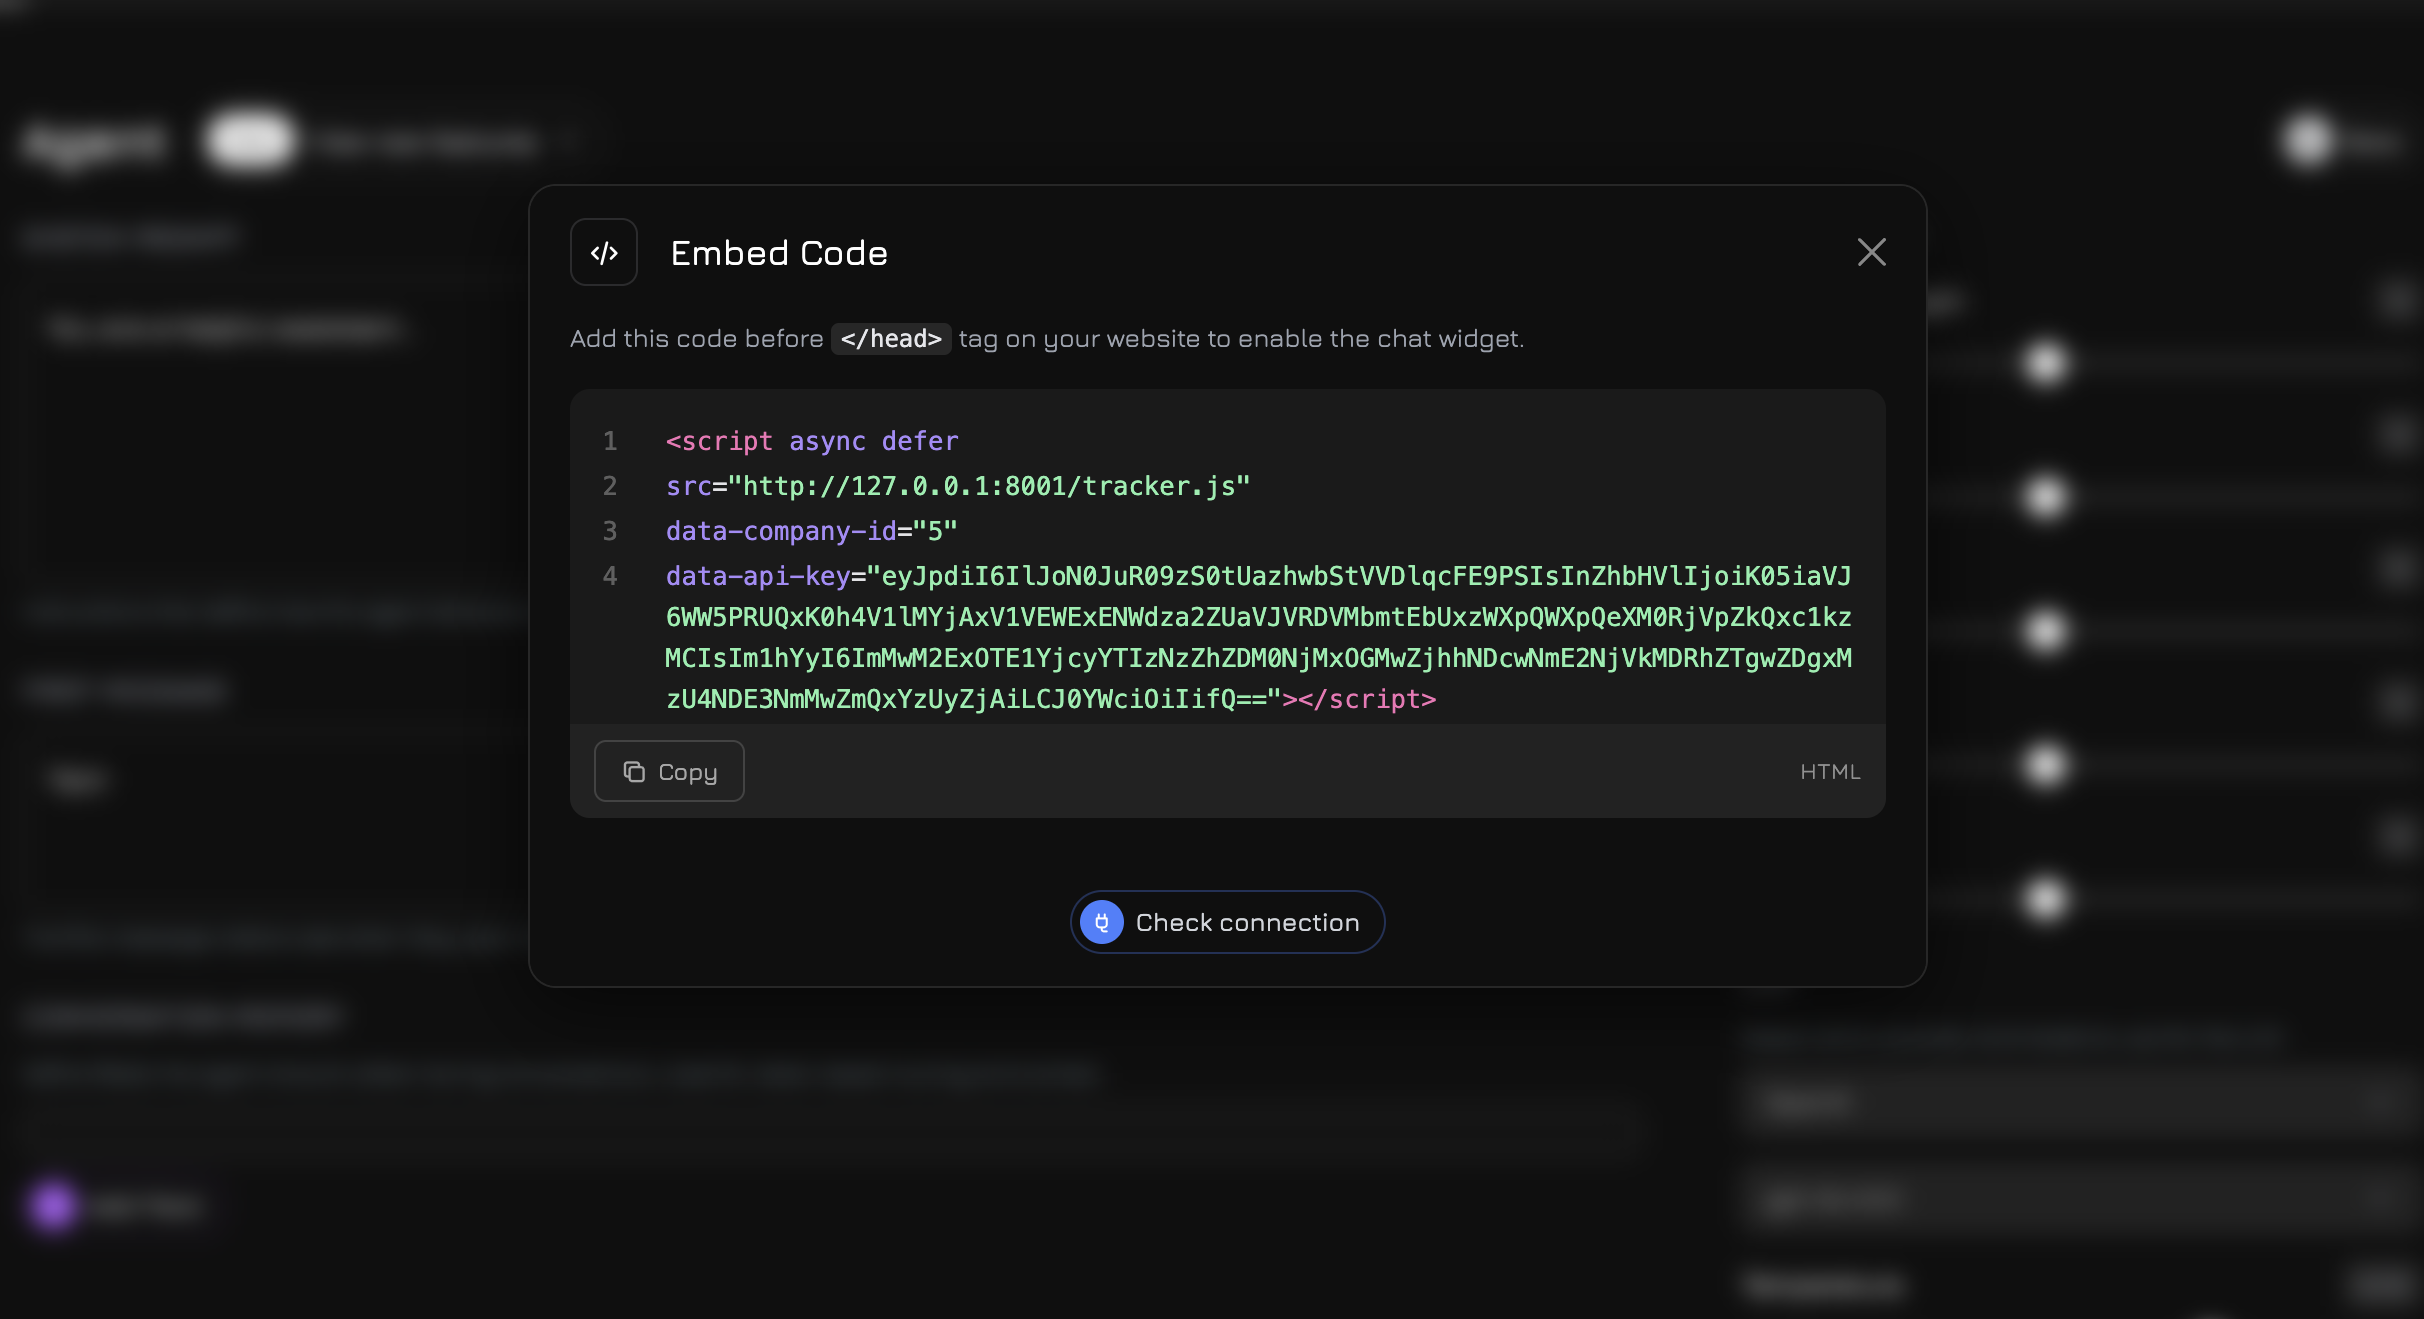
Getting the Code
- Click Generate API Key (if a key hasn’t been created yet)
- Copy the widget HTML code
Adding to Your Website
Add this code before the closing</head> tag on your website:
- Chat widget — a button in the corner of the site for communicating with the agent
- Visitor tracking — sessions, pages, events, UTM tags
- Voice communication — if enabled for the agent
The widget renders in Shadow DOM — its styles are fully isolated from your website and vice versa. No CSS conflicts.
Checking the Connection
After installing the script, return to the Embed Code modal and click Check Connection. Revol will verify that the widget is correctly connected to your website.Next Steps
Workflow Editor
Create complex conversation scenarios with conditions, branches, and tool calls
Integrations
Connect Telegram, WhatsApp, telephony, and other channels
Widget Customization
Change colors, texts, placement, and the appearance of the widget
Analytics and Tracking
Track visitor sessions, events, and conversions